Wednesday, March 21, 2018

Hippie Soul Gatefold Mini Album Tutorial by Nuneka


Hi there, album makers!  It is an honor and a pleasure to be Guest Designer this month for Mini Album Makers.  My name is Nuneka, that’s how my close friends call me, I’m a photographer and I live in Spain.  I’ve always loved to create things with my hands and express myself through my art, but it was when I started traveling and taking photos when I felt the need of making my own albums. Even though I had no clue about scrapbooking, I bought my first papers and begun creating. After many years, I’ve started my blog and YouTube channel a few months ago. There you can find scrapbooking and Mix Media projects and tutorials.

Blog: http://meraki-spirit.blogspot.com
YouTube: https://www.youtube.com/MerakiSpirit

In this special occasion I’ve created an original album for you all. It is dashing and pretty easy to make following the step by step tutorial or the video. I’ve named it Hippie Soul.  It looks like a regular album, but when opening you find a gatefold. And when you open it again, you end up with a four parts structure.


On the left of the the first section (A1) there are four small flaps with magnets covering a big photo mat. On the right (A2) you find a cute notebook held with a magnet.


In the second section, there is a double pocket on the left (B1) where you can insert lots of photo mats, depending on the leftover paper you have.  On the right (B2), there are two flaps covering a big photo mat.


The final and central section (C1-C2) is place for two waterfalls. I’ve added scrapbook paper only in one side, leaving the other for writing.


To decorate the cover, I’ve used fussy cut elements, flowers, natural feathers and a sentiment on a metal badge.


This is a diagram of the album structure.


Covers & Structure
To make the covers you’ll need 3 pieces of cardboard:
• 1 @ 1 1/4 x 8
• 2 @ 6 x 8

I like to use a piece of elastic adhesive bandage to stick them together, leaving a little space between the pieces. This way is much easier to fold the covers once they’re wrapped. I stick the spine piece to the bandage first, and then the other two pieces. But you can wrap the covers as you usually do.

To wrap the covers, you’ll need 2 pieces of cardstock:
• 1 @ 10 x 16 (for the outside)
• 1 @ 2 5/8 x 7 7/8 (for the inside)

I usually stick the wrapping cardstock with scor-tape in the outside, but for the small piece to cover the spine in the inside I use binding glue, or some other strong liquid glue because this makes it easier to fold the covers once this piece of cardstock is added.


To add the structure, you’ll need 2 pieces of cardstock:
• 2 @ 7 7/8 x 6 15/16
With the 7” side up, score at 6 and 6 1/2

This way you’ll get a tab and a small spine.  Add scor-tape to the tabs and stick them to the edges of the covers, so you’ll get a four pieces structure.  This pieces are slightly smaller than the covers so you can close the album properly; just make sure you stick them centered.  The pieces must fold inwards.


When the album is closed, it should look like this:


A1
This is the first page you’ll see on the left side of the album when opening, it is the exterior side of the left structure. To make the little doors of this page you’ll need 4 pieces of cardstock:
• 4 @ 3 5/16 x 3 15/16

With the 3 5/16” side up, score each piece at 3/8 to make a tab, set scor-tape and stick them to the edges so they will open from the center to the sides (make sure you don’t stick the left ones on the spine).


Before you glue the scrapbook papers, set magnets in the doors and the background piece. All the scrapbook papers in the album are 1/8” smaller than the area they cover.


A2
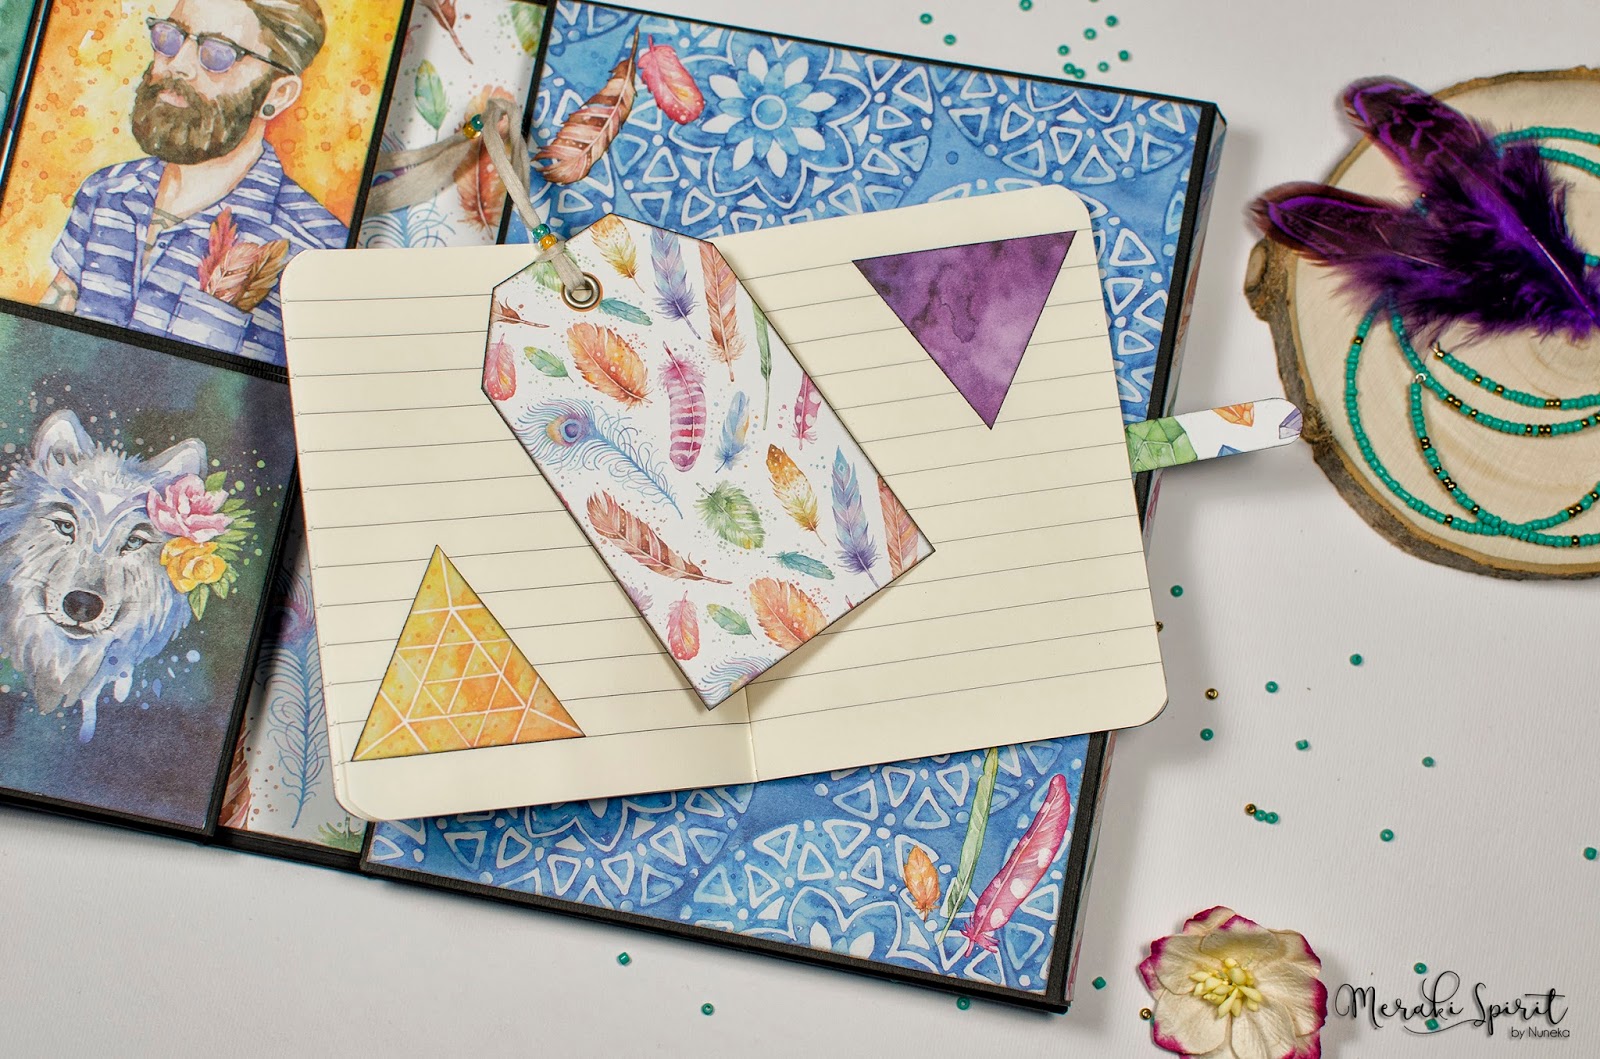
This is the first page you’ll see on the right side of the album when opening, it is the exterior side of the left structure. To make this part you just need a small notebook that will be attached to the  structure with magnets.

I’ve used a 3 1/2 x 4 3/4 notebook and covered it with a piece of paper from the same collection. I hid a strong magnet under a belt in the back side of the notebook and set another one in the background piece before gluing the scrapbook paper.


If you don’t want a belt in your notebook, you can set your magnet before covering the notebook with the scrapbook paper.


B1
This is the interior side of the left structure. For building the pockets you’ll need 2 pieces of cardstock:
• 1 @ 6 5/8 x 3
• 1 @ 6 5/8 x 3 7/8

Take the smaller piece and score 3/8” in one large side and both short sides to create three tabs. Cut the tab corners in angle, set scor-tape and stick it to the lower end of the structure as a pocket.  Take the larger piece and, with the 6 5/8” side up, score at 3/8 and 6 1/4 to create two tabs. Cut the tab upper corners in angle and cut in angle the piece from 2 5/8 to the end to make it fit in the pocket.


Once you’ve stuck your pockets fitting one on another, glue your scrapbook paper in the three sections. When you end the entire album you can make photo mats for the pockets at your convenience, depending on the leftover papers.


B2
This is the interior side of the right structure. For building the flaps you’ll need two pieces of cardstock:
• 2 @ 3 1/2 x 5 7/8

With the large side up, score each piece at 5 1/2” to make a tab. Set scor-tape, place a magnet on each piece and glue your scrapbook paper.  Stick one of piece to the upper end, at 3/8” from the right edge. Stick the other piece to the lower end, at 3/8” form the left fold. Set two magnets on the background matching the flaps and cover with your paper.

C1 – C2
These are the central photo waterfalls. For each waterfall you’ll need eleven pieces of cardstock:
• 9 @ 4 3/8 x 5 (for each waterfall)
• 1 @ 3 3/8 x 5 (for each waterfall)
• 1 @ 5/8 x 6 1/4 (for each waterfall)


With the 4 3/8” side up, score the nine pieces at 4. Add scor-tape to the tabs and stick one piece next to the other on the 3 3/8 x 5 piece. I like to make it this way to get a perfectly straight waterfall. Add scor-tape to the back side of the 3 3/8 x 5 piece.


Score the 5/8 x 6 1/4” strip at 5 1/2. Round the squares and set a magnet on the back side. Then glue your paper to the strip and stick it centered in the lower end of the central sections. Glue your papers only in the front part of the waterfall flaps and make sure to leave the first one uncovered, cause you need to set a magnet there.  Glue the base paper of the section and stick the waterfall centered in the
middle. Now you can set the magnet making it match to the one on the strip. Then glue the last paper.


Last step
The album is pretty much done, you only need to set some scrapbook papers on the spines and covers and decorate it to your liking. So measure the spine, cause it is always a little larger than the cardboard piece you used and glue some paper both in the outside and the inside.  Then do the same with the other small spines and the covers.  In my case I fussy cut lots of feathers and elements from the paper collection and mixed them with paper flowers, natural feathers, wool and ribbon to decorate the cover. Furthermore I used a white gel pen to draw some lines and arrows here and there.


With the paper you have left, make photo mats to fill the B1 pockets. I’ve used black cardstock, glued paper only in one side and drawn with the white pen in the other side.


If you like video tutorials, you’re welcome to my YouTube channel.  I hope you are inspired today!  Find our current challenge HERE.

Wednesday, March 14, 2018

Mini Album Tutorial by Nancy Wethington - Simple Spiral Binding


Hi mini-book makers!  Coming to you today from Nancy-land.  Thanks for joining me for a very  simple binding I've been using for years: spiral binding.  I've chosen to use a Zutter binding system but you can do the same thing with a We R Memory Makers Cinch.


I adore these chipboard books that Zutter makes. They have rounded spines that look exactly like antique books.


They also have a built in back pocket that makes it super easy to bind.  Also included is the hard plastic pocket insert.


Let's get started.
  1. Choose the cardstock you want to use for your pages as well as how many pages you want to use in your book. 
  2. Cut the cardstock to the appropriate size for your mini.
  3. Punch the pages and insert the spiral binding.
That's it!  Here are some photos of how I put mine together:


For the book size I was using, my cardstock was cut 7 3/4" tall X 7 3/8" wide.  Instead of placing the spirals in the center of the book, I chose to do two sets of spirals, each with 6 binding holes.


Notice the instructions on the side of the Zutter:


Holes are punched.  Do this with all of the book pages, including the plastic insert that comes with the Zutter book.


Take all of the pages and the plastic insert and feed them through the small loops.  
(For the purpose of photography, I'm doing one page at a time.)


Adjust the Zutter to match the size of the coils.


Place the coils in the Zutter, opening side down. Hold the pages up and push the handle down, squeezing the coils closed.


Here it is, all squeezed together.  


The plastic insert is attached.  


It can be inserted into the included pocket.  Decorate as desired.


You are invited to visit my website for a page-by-page look at how I decorated my mini.  We hope you get a chance to play along this month.  You could be a Mini Album Makers Challenge Winner and have a chance to win a full set of Baked Texture embossing powders from our super talented sponsor, Seth Apter!

Wednesday, March 7, 2018

Winners Post for February 2018

What an amazing array of entries for our February challenge.  Thank you so much for your support and inspiration!  If you have yet to review the February challenge entries please visit the post for some amazing inspiration.  It's never an easy job to narrow down to a few winners, but without further ado...


The overall design team favorite badge goes to Gibonik.  Gibonik, we would love to invite you to be our guest designer for the month of April.  Please email Autumn at teamclark@rocketmail.com to discuss further.


Not only is the mixed media style cover of this junk journal absolutely incredible, the pages are equally amazing.  We absolutely love your style and creative ideas!


Our top five entries are equally stunning.  Each of you, please take our top five badge and display it proudly on your blogs.  In no particular order...


First we have Anna Alexeeva of Pleasant Moments with an exquisite vintage style album.  The alluring cover opens into pure joy...


What a treasure!  We are all in awe of your skills and artistic expression with this book.


Next, we have WuWu of Zatoka Wspomnien, again in our spotlight with her sublime layering and unique embellishments.  


We are teased to only look and not touch these beautiful pages with so many incredible inserts...


Ruth of A Love to Create created this jaw-droppingly cool spool album.  Look at those luscious stitches and colors!


A true work of art, Ruth!  We are impressed for sure!


Mukta Parvatikar-Maniar of VREnchanged Color, Craft & More created a delightful traditional style album, with all but traditional pizzazz!  What amazing colors and textures reign throughout!


With so many tricks up her album making sleeve, this album will certainly be cherished!


Giovanna of GiogioCraft created one of the most amazing pieces of art blogland has seen in ages!  This little box opens to reveal a fantastical and unique album...


Gio, you always amaze us with your creativity, but this is over the top cool and creative!  What a great assemblage cover on both the box and album - WOW!


Thank you all very much for playing along.  And now, the announcement of the winner of the $25 gift certificate to Lindy's Stamp Gang.  


And the winner is.....


That's Maggie of I'm a Dreamer!  What an amazing book Maggie!  Such a stunning and useful journal for your friend.  <3


Biggest congratulations!  Maggie, please email Autumn at teamclark@rocketmail.com to claim your prize.  We hope you are fully inspired and will play along with our March challenge for a chance to win a full range of Seth Apter's Baked Texture Embossing Powders.  Join us next Wednesday for a fantastic design team tutorial by Nancy Wethington.  :)