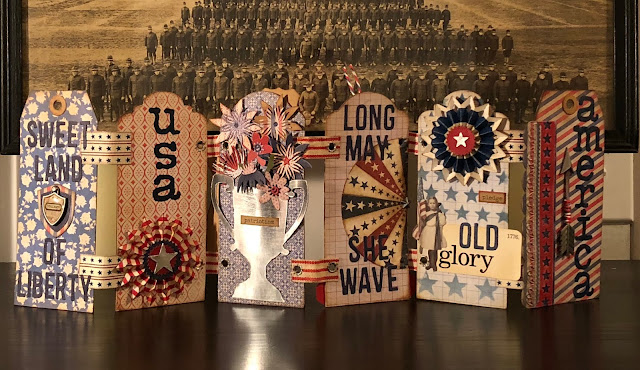
I love the look and potential that accordion style albums provide, the way that they open up and present many different facades, each a vignette of its own. When I create I have a tendency for pieces and embellishments to extend beyond the page; knowing that this can present a dilemma for binding, I decide to allow the folds of my album to be left open. Each tag is hinged apart from its predecessor at only two points. I want my hinge material to be sturdy yet flexible, allowing for space to build-up layers on each page and for inclusion of dimensional embellishments, yet I still want it to be able to fold completely. Album making is fairly new to me and each one that I create begins only with an idea. Then, typically during the creative process, I encounter obstacles and work my way through them. I enjoy figuring out the remedy as much as I enjoy creating the project.
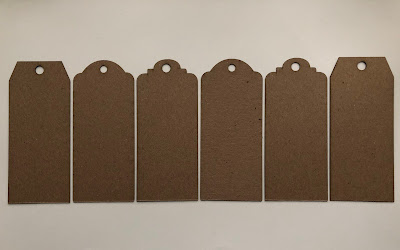
Today I am sharing an americana accordion album I created from chipboard tags. I used two sets of large chipboard tags from Gypsy Soul Laser Cuts. I love the weight of these tags, they are sturdy enough to withstand a lot of mediums yet they can be easily pierced. This is important since I am using eyelets to hold my binding pieces in place.
Knowing that my album will have an americana theme, I gather many of my patriotic papers, stamps, stencils and embellishments. I like to have everything at hand, I find it to be the easiest way for me to generate design ideas. Some of my favorite papers to use for red, white, and blue projects are from Tim Holtz Correspondence Paper Stash.
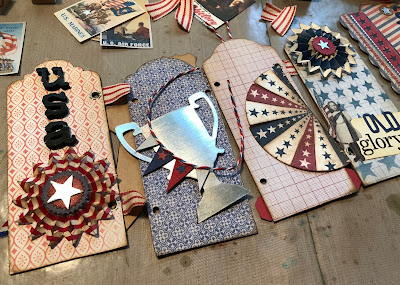
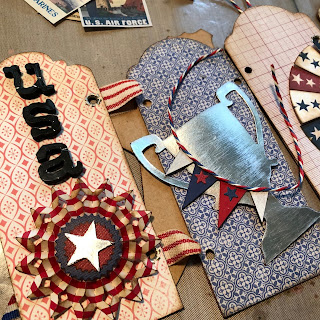
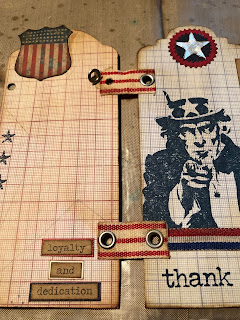
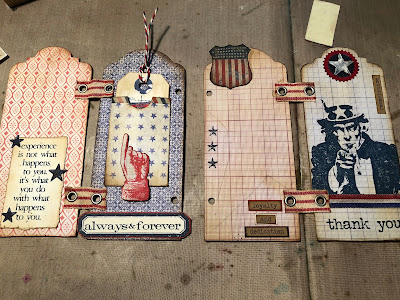
The album is made up of six tags. Each tag is covered on the front and back sides with patterned paper. I apply a layer of collage medium to adhere the papers and allow to dry, then I ink each page with antique linen distress ink to give more of a vintage feel. I also add gathered twigs distress ink around the edges. After the base tags are done, I line them up on my table in the order they will appear in the album. I make a mental note of which tags will fold in a valley and which will fold as a mountain. This is important to keep in mind when you have pieces that overhang the edges. It is much simpler to fold if the piece extends onto a mountain versus a valley. I begin to arrange the design elements on the tags. As the design ideas evolve, I mark the "hinge" locations, and using a crop-a dial, and punch the holes for the eyelets. {I want to note that initially, at this point, I added two of the hinge ribbons, then realized that it will be best to wait to complete the hinges until more of the design elements are finalized.}
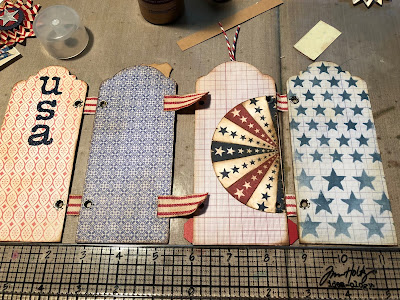
I take notes on which pieces overhang the edges and the lengths that they extend. This allows me to calculate the distance between each tag when the hinge ribbon is attached.
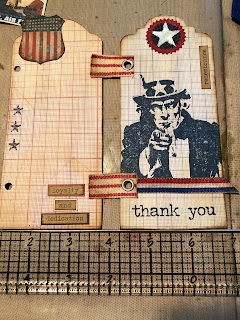
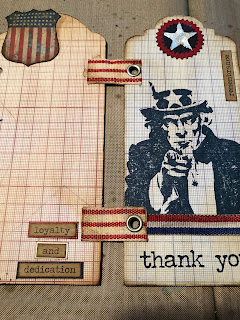
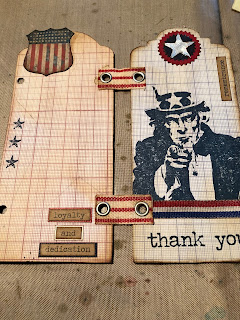
Be sure to pay attention to the tags that are adjacent to each other. I make the hinge pieces for my cover panel and end panel longer than the interior pages to accommodate the flashcard that extends as well as a decorative trim piece that runs along the left side of the cover. Another helpful tip to consider is the order in which each element is adhered. I do not glue any of the larger elements to the tag until the hinges are all installed. This allows for ease of setting the eyelets or whatever you will be using to attach hinges. I need to use a Crop A Dial Big Bite to accommodate the tag length. Another helpful tip for this type of hinge system is to glue the binding ribbon in place and allow to dry prior to inserting the eyelet. {I learn this lesson the hard way on my first attempt, and everything works alright, but the binding ribbon does not stay in a straight line like I want it to.}
As I work my way through each panel, I try to be cognizant of what is going on the reverse side of that page. When it is time to attach the bindings, I use a straight edge to keep the bottoms of each tag aligned, as well as to measure the appropriate distance between. I set eyelets in a pair of tags at a time, leaving the cover and last tag until the very end. Some pieces are trickier than others. The star tag must be put together in the correct order to ensure that the extension does not obstruct the opening and closing of the album.
Once I have the first and second pairs of interior tags hinged (these are both mountain folds from the front side),
I flip the tags and attach those pairs together on the reverse side (this is a valley fold on the front; therefore it's a mountain fold on the reverse).
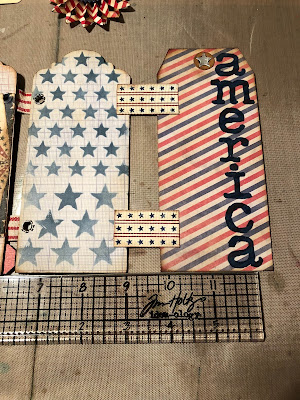
I use the same method as previously mentioned, aligning and measuring, then gluing the binding ribbon into place and allowing to dry before setting the eyelets.
Once all of the interior hinges are secured, I adhere all remaining elements on the front sides and do a final check on the accordion fold.
The front cover and end tag are hinged at a greater distance. I follow the same process as the interior hinges, but decide to omit the eyelets on these hinges. This will give it a cleaner look as well as be a bit less bulky under the cover trim piece. {I also realized that I had added an embellishment on the front side that would be ruined when the eyelet went through the tag.}
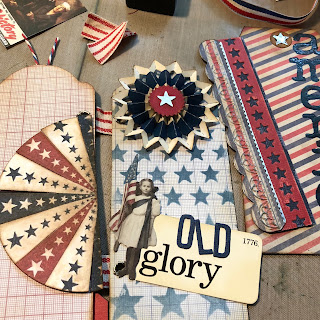
The final step in creating my accordion album is to adhere all of the design elements and embellishments to these sides of the tags.
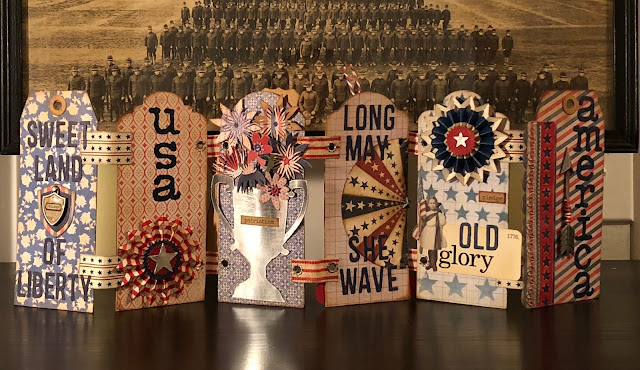
The "front" and "back" sides of the complete album:
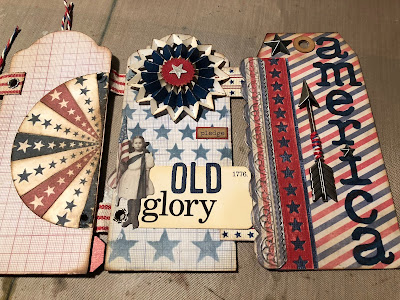
Following are some close-ups of each page of the final album.
I have really enjoyed creating this americana accordion album for Mini Album Makers Challenge blog. As all of the patriotic elements came together I was constantly reminded of and humbled by the servicemen and women who are always working to keep our beautiful country safe and our liberties and freedoms intact. My album is a tribute to all of those who serve or have served. I come from a very long line of patriots and have always had a huge amount of respect and gratitude for the dedication and loyalty of these fine souls.
I hope that you are inspired to create an album of your own and submit it to the current challenge for a chance to win a $25 gift certificate to Lindy's Stamp Gang. I always look forward to admiring the DT projects as well as the challenge submissions. I am so thankful to Autumn and all of the design team for allowing me to create for them.
~Ann
x
