Thursday, December 21, 2017

Interactive G45 World Fair Mini Album Tutorial with Maggi Harding


Hi there, I am Maggi Harding and I am super excited to be the guest designer this month!  This is such a great blog, with so much inspiration for all mini album makers from those that are just learning to those that have been making minis for years.  There's something for everyone.

Now, I know it's December and  I know many of us are deep into holiday projects, but I thought it would be fun to take a break from that and do something really colorful and fun.  Bright and bold colors are my favorites and so I've chosen Graphic 45's World's Fair collection to make a really fun mini with lots of interactive pages.


In the process video tutorial below, I show you how I made all the pages and share some of tips and tools with you.  If you like my tutorial, please subscribe to my channel and give me a thumbs up, I surely would appreciate that!


Now here's a look at some of the pages inside.


This page features a set of photo mats that are layered over each other and flip up; this is called a waterfall.  These are great fun to build and I used a Spellbinder's Tammy Tutterow  die set to make my waterfall.


I also incorporated a couple of Graphic 45 Policy Envelopes in my mini.  They are great for holding little loose objects that you don't want to lose.  You can use most envelope in your mini, it does not have to be a Policy Envelope.  On the right side there's a tuck spot and a flap that opens up to reveal another photo or journaling spot.


The left page has a flip up that hides a pull out that can hold 5 photos.  The right side is the front of another Policy Envelope.


The right side has a flip up that hides a journaling spot.  It's also a pocket page and you can see the red pull tab peaking out at the top right.


I think this is my favorite set of pages.  The left features a simple pocket, but the right has lots of fun flips.  The below photo shows the page with the first part flipped open.


After flipping the horizontal layer out, you can flip the floral page up and underneath that is another page that also flips up.  You can better see all the action on this page in the video tutorial.

Supplies:
Graphic 45 Worlds Fair Collection
Cardstock
Light weight chipboard
Zip Dry Glue
1/8" thick foam tape
Scor-Tape assorted widths, 1/8", 1/4", 1/2"
Miscellaneous Petaloo flowers
Cinch machine for binding - Note you could easily punch two or three holes and bind with rings.

I hope this has inspired you to play along with the December challenge for a chance to win an Eileen Hull Sizzix Scoreboard XL Mini Album die.


Thursday, December 14, 2017

Mini Album Tutorial by Astric Maclean - One Sheet Wonder

Hello mini album  friends, thanks for dropping in here during this busy time of year.  I have a quick and easy tutorial for a tiny little mini album to share with you. I have called it One Sheet Wonder, as the whole album can be made from one sheet of 12 by 12 paper/cardstock, plus some scraps of design papers you may have in your stash.


The base of my album was made with a piece of 12 x 12 kraft card and for the decoration and inside pages I used bits of Maja Design Christmas papers.

Below a quick tutorial:

1. Take your sheet of 12 x 12 card and score at 1.5", 6" and 10.5".

2. Turn the sheet by 90 degrees (half turn) and score at 3", 6" and 9".


3. Turn the sheet so the 1.5" scores are on the left and right and cut as shown in the diagram.

4. Now your little book is ready for folding and gluing.

I thought that rather than giving you a longwinded written explanation of how this is done, I would give you a link to a video tutorial by Dawn from Dawn's Inspirations, who shows really clearly how this is done: To see it, just CLICK HERE. The important bit starts at the 25 minute mark.

Here are a few close up photos and a video slideshow of my little book.


I used a Calico Craft Part for my sentiment. The decorative corner bit is from Gypsy Soul Laser Cuts, one of our fabulous sponsors.

I created a belly band to close my little book and also made a little spine around the side for extra stability. This is easy to do - cover the front and back of your book with your chosen papers, then cut an extra strip of about 1.5 inches wide and 4.5 " high (the height your little book will be when folded together). Shore at 1/2" intervals along the short side and fold around your covers - done.


There are little pockets on each of the inside pages, created by folding up along the 1.5 inch score lines as you will see if you watch the video tutorial. I made little tags to go inside, but of course you could equally well use photos, ephemera or whatever you want.


Below a short video slideshow to show you some further inside pages.


Well, that's it. Hope your holiday preparations are going well, and hopefully you will have a chance to play along in our challenge this month, - we always love to see what you create!

Thank you for your visit here today and happy crafting and creating.
xxxxx

Thursday, December 7, 2017

Winners Post for November 2017

Our November challenge entries were once again TOP NOTCH!  Thanks so much to each one who participated and visited.  If you have yet to review the November entries please visit the post HERE.  It's never an easy job to narrow down to a few winners, but without further ado...


The overall design team favorite badge goes to Maj of M-1309.  Maj, we would love to invite you to be our guest designer for the month of January.  Please email Autumn at teamclark@rocketmail.com to discuss further.


The overall aesthetic of this book just wowed us!  What beautiful colors and layering.  Maj's binding is equally inspiring.  Congratulations and thank you for this beautiful inspiration!


Our top five entries are equally stunning.  Each of you, please take our top five badge and display it proudly on your blogs.  In no particular order...


Jennie from Live the Dream whose use of muted color and texture make this treasured travelers notebook one that we all want to flip through and inspect.  What a beauty!


Maria of Magic Attic Designs is an expert, and we all could take a page from her book - quite literally!  These cleverly designed tiny books are also necklace pendants.  :)


Giovanna of GiogioCraft used and shared so many beautiful techniques for her midori journal.  What a treat to watch her process by video!  Thanks so much for sharing!


Kate of Kate's Scrap Yard whose mixed media journal is truly an incredible work of art.  We just love how Kate bound this chunky mixed media journal!


Debbie of Prairie Rose Cafe whose traditional style of mini album is certain to bring joy to anyone who sees it.  Debbie filled this album with many beautiful details making it a must see!  

Prairie Rose Cafe: New Christmas Mini Album

Thank you all so very much for playing along.  And now, the announcement of the winner of the Lindy's Stamp Gang $25 gift certificate...


And the winner is.....


Nora from Creations by Nora!  Nora's box book and mixed media cover art is truly one of the most creative projects in the blogosphere.  Do check out her video!


Biggest congratulations Nora, please email Autumn at teamclark@rocketmail.com to claim your prize.

We hope you are fully inspired and will play along with our December challenge for a chance to win an Eileen Hull Sizzix Mini Album ScoreBoard XL die offered by the one and only Eileen Hull herself.  Join us next week for a new design team tutorial by team member Astrid Maclean.

Friday, December 1, 2017

December Mini Album Tutorials and Challenge

Hello and happy December!  Our challenge blog continues to flourish with so many beautiful entries in our November challenge as well as inspiration from our guest designers and design team.  It was amazing to see each and every project and get to know some new faces.  If you haven't visited the entries, do hop over and check them out.  Today we begin a new challenge and fabulous new sponsor, Eileen Hull herself!


Eileen is a Sizzix signature designer.  Her passion for papercrafting has flooded the industry with incredible, innovative products that make papercrafting an ease and joy!  Find out more about Eileen and join her Facebook Fan Club today!


Eileen has so generously offered a Sizzix Mini Album ScoreBoard XL die to the lucky winner of our December challenge.  Can you say merry Christmas?!  


Our team wows us once again with their amazing albums.  Hop around to each blog for the full reveal and tutorial for each project.  


I'm getting ready for the new year with Heartfelt Creations folios decorated with Graphic 45 & Gypsy Soul Laser Cuts. Once in a book, I'm ready for 2018! Hop on over to my blog and see the finished product.


I've created an envelope book, made from the almost-ATC-sized money envelopes I got in a cheapy store.  It's got a wintry woodland look to it, so it's perfect for the time of year.  I hope you'll hop over to Words and Pictures to take a look at the interior pages and find out how I made it.


I used Eileen Hull's Minialbum die to create this Vintage Christmas themed little album. If you would like to see more details of how I put this together, please come and visit me at Astrid's Artistic Efforts.


I needed to say thank you to some lovely people who have been a huge support over the last couple of months, so I used Eileen Hull's fabulous Passport Die to create some personal journals.  You can see more over on my blog.


Gloria

I have used the Sizzix ScoreBoards XL Journal die by Eileen Hull to create this quick and easy Midori-style journal. This is a very simple project, made even easier with the use of the journal die cut shapes! See the tutorial on my blog: Scraps of Life.


I too used the Eileen Hull Mini Album die with the Tim Holtz Christmas stash and a few twists to create my mini.  Find all of my tricks for transforming this die from Midori style to fixed pages with flaps and pockets at SewPaperPaint today.


I hope these peeks have sparked your imagination and you will pay the design team blogs a visit.  We welcome you to play along with our challenge, which ends at the stroke of midnight on December 31.  Join us on December 7 for our November winners announcement.


Our challenge follows a few simple rules:
Any Handmade Book Goes.  Enter any form of handmade mini albums, scrapbooks, journals and book arts.  Our focus is on completed works, so no layouts or journal spreads that are not part of a complete handmade book project.  You do not have to provide a tutorial, but we wish you would.  Feel free to use one of the DT tutorials to make your project and give proper credit where due.

No back linking allowed.  
Please add our badge to your post and link to our challenge.  

Combine with any other challenges as applicable.  No limit on entries.  Share the love by visiting and commenting on other entries.  Please become a follower.  That's it - have fun!

You are invited to the Inlinkz link party!

Click here to enter

Tuesday, November 21, 2017

Collage Junk Journal Tutorial by Heather Maxwell


Hello all and thank you for honoring me with this guest designer spot! Heather here, very excited about this new blog featuring my new favorite thing: handmade journals! Today I want to share with you a journal I made in the vein of a growing trend called Midori travel journals. This type of journal is meant to be carried with you and added to as you go. This is the perfect project to clean out your stash. All those papers, bits and bobs you’ve been saving because they are too good to throw away – pull ‘em out!


Covers
I began by cutting the covers using Eileen Hull’s journal die with Sizzix Little Sizzles mat board sheets. These are very sturdy and conveniently sized to fit the die. Alternately you could cut your own matboard or chipboard down to the 6” width to run through your favorite die cutter. If you don’t have a die cutting machine, a plain old xacto knife will do the job with only a bit more effort and elbow grease.

The die I used cuts one cover with holes in the spine so it takes two passes to get front and back covers. I assembled the two covers with score tape and glue for extra hold. Then came the fun part of collaging the whole thing. There is no right or wrong way to collage. To me it is reminiscent of finger painting as a child. Very therapeutic (and delightfully messy)!


Signatures
For the signatures, gather your papers together and cut to size, slightly smaller than your cover size. You’ll want full sheets that will fold in half to make the signatures. For this journal I coffee dyed vintage onionskin paper (old typing paper) as well as good quality printer paper. There is an excellent tutorial HERE. I used waxed linen cord to bind my signatures. The wax helps keep the string in place without slicing the papers. I used the three-hole pamphlet technique to bind the signatures. Tutorial for that HERE. As you can see, I stitched some old glassine I had in my stash onto the sturdier paper, tucking in a found relative before closing the stich line. If you want to add any stitching to your pages do it before binding the signature (unless you like smacking your forehead later).


Stringing the Journal
Midori style journals use elastic cord to hold the signatures. The benefit of this is that you can easily add or remove signatures and pocket folders at any time. As mentioned above, the die I used also punches holes in the spine. There are directions to string the journal using those holes on the sheet included with the die or you can view a tutorial HERE. I finished my strings by putting them through the center hole instead of tying them inside as in the tutorial. Mine act as the closure for the book as you can see below.  As an alternative you can punch holes with your long reach Cropadile in the same configuration and use the same stringing method. Since I also covered the spine with a separate sheet I re-punched the holes after adhering the cover paper.


Admire your work!
I had so much fun creating this journal! I hope you will try one for yourself, whether you use a die to cut your covers or do it by hand, it is a very satisfying project. Once it is all together you can go back and tuck in all those sweet little bits you’ve been saving. Add sparkle or ribbon – make it your own! Thanks for sticking with me through the whole tutorial.  ~ Heather


Tuesday, November 14, 2017

Mini Album Tutorial by Alison Bomber - Toilet Roll Album

Hi, Alison here, delighted to be sharing some mid-month inspiration with a tutorial and, yes, it's a toilet roll tutorial!


Some time very early in my crafting journey I saw a mini album made from leftover toilet rolls, and since then I've made a number of them in various styles.  It always makes me happy as I see something so mundane being transformed into a fabulous little book.


This one uses papers from one of our sponsors, Graphic 45, and is ready for photos, notes and memorabilia to be added to its pages and inserts, so let me take you through the basic steps of how I made it.


I've given a few measurements in places, just so you have a general idea, but it will vary according to the size of your toilet rolls - believe it or not, they're not all the same - so none of this is set in stone.  And I'm always more of a "by eye" crafter than a millimetre-perfect one.  The imperfections are part of the fun for me.


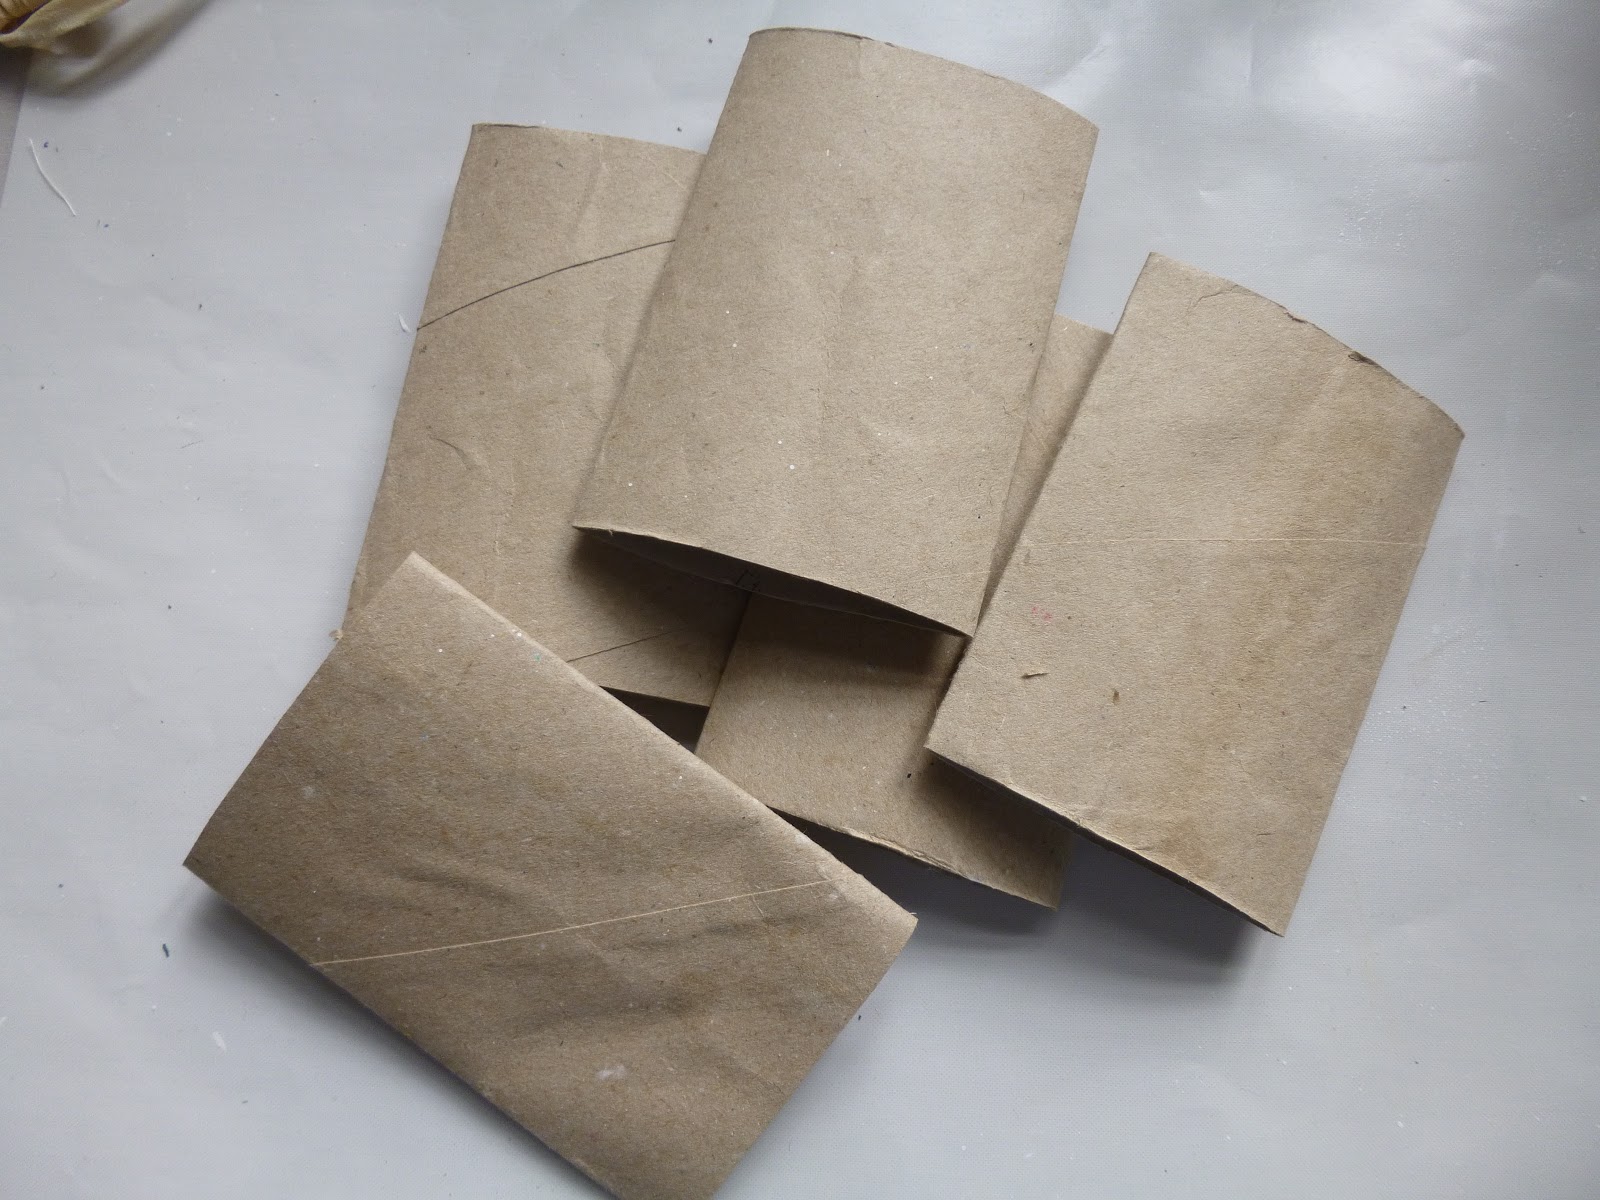
So you start by saving up your toilet rolls - five or so is a good number - and simply press them flat.


I then usually paint the ends and edges and just inside the "pockets" so that there won't be any grey cardboard showing later on.  It's just easier to do this now than later.


Once they're dry, it's a good idea to give them another pressing with a weight of some kind.


For the covers, I use a piece of greyboard.  If I'm lucky, there'll be a reinforced envelope knocking around so I can use the card from that.  If not, the back of a pad of paper is another good option.  For this, I raided my bought stash of greyboard.


Again, I generally do this by eye.  You want covers which are a little bigger than the "pages" top-to-bottom and quite a bit bigger than the width.  This allows for the inserts later.


If I've only got a small piece of card, I'll cut separate front and back covers and work something out for the spine later on.  With this A4 size piece, I decided to make my covers and spine all in one go.  As you can see, that gives me a nice wide spine in the centre to play with.


Some gentle scoring allows me to make the folds and voila - we have the structure.  Now we can start to decorate it.


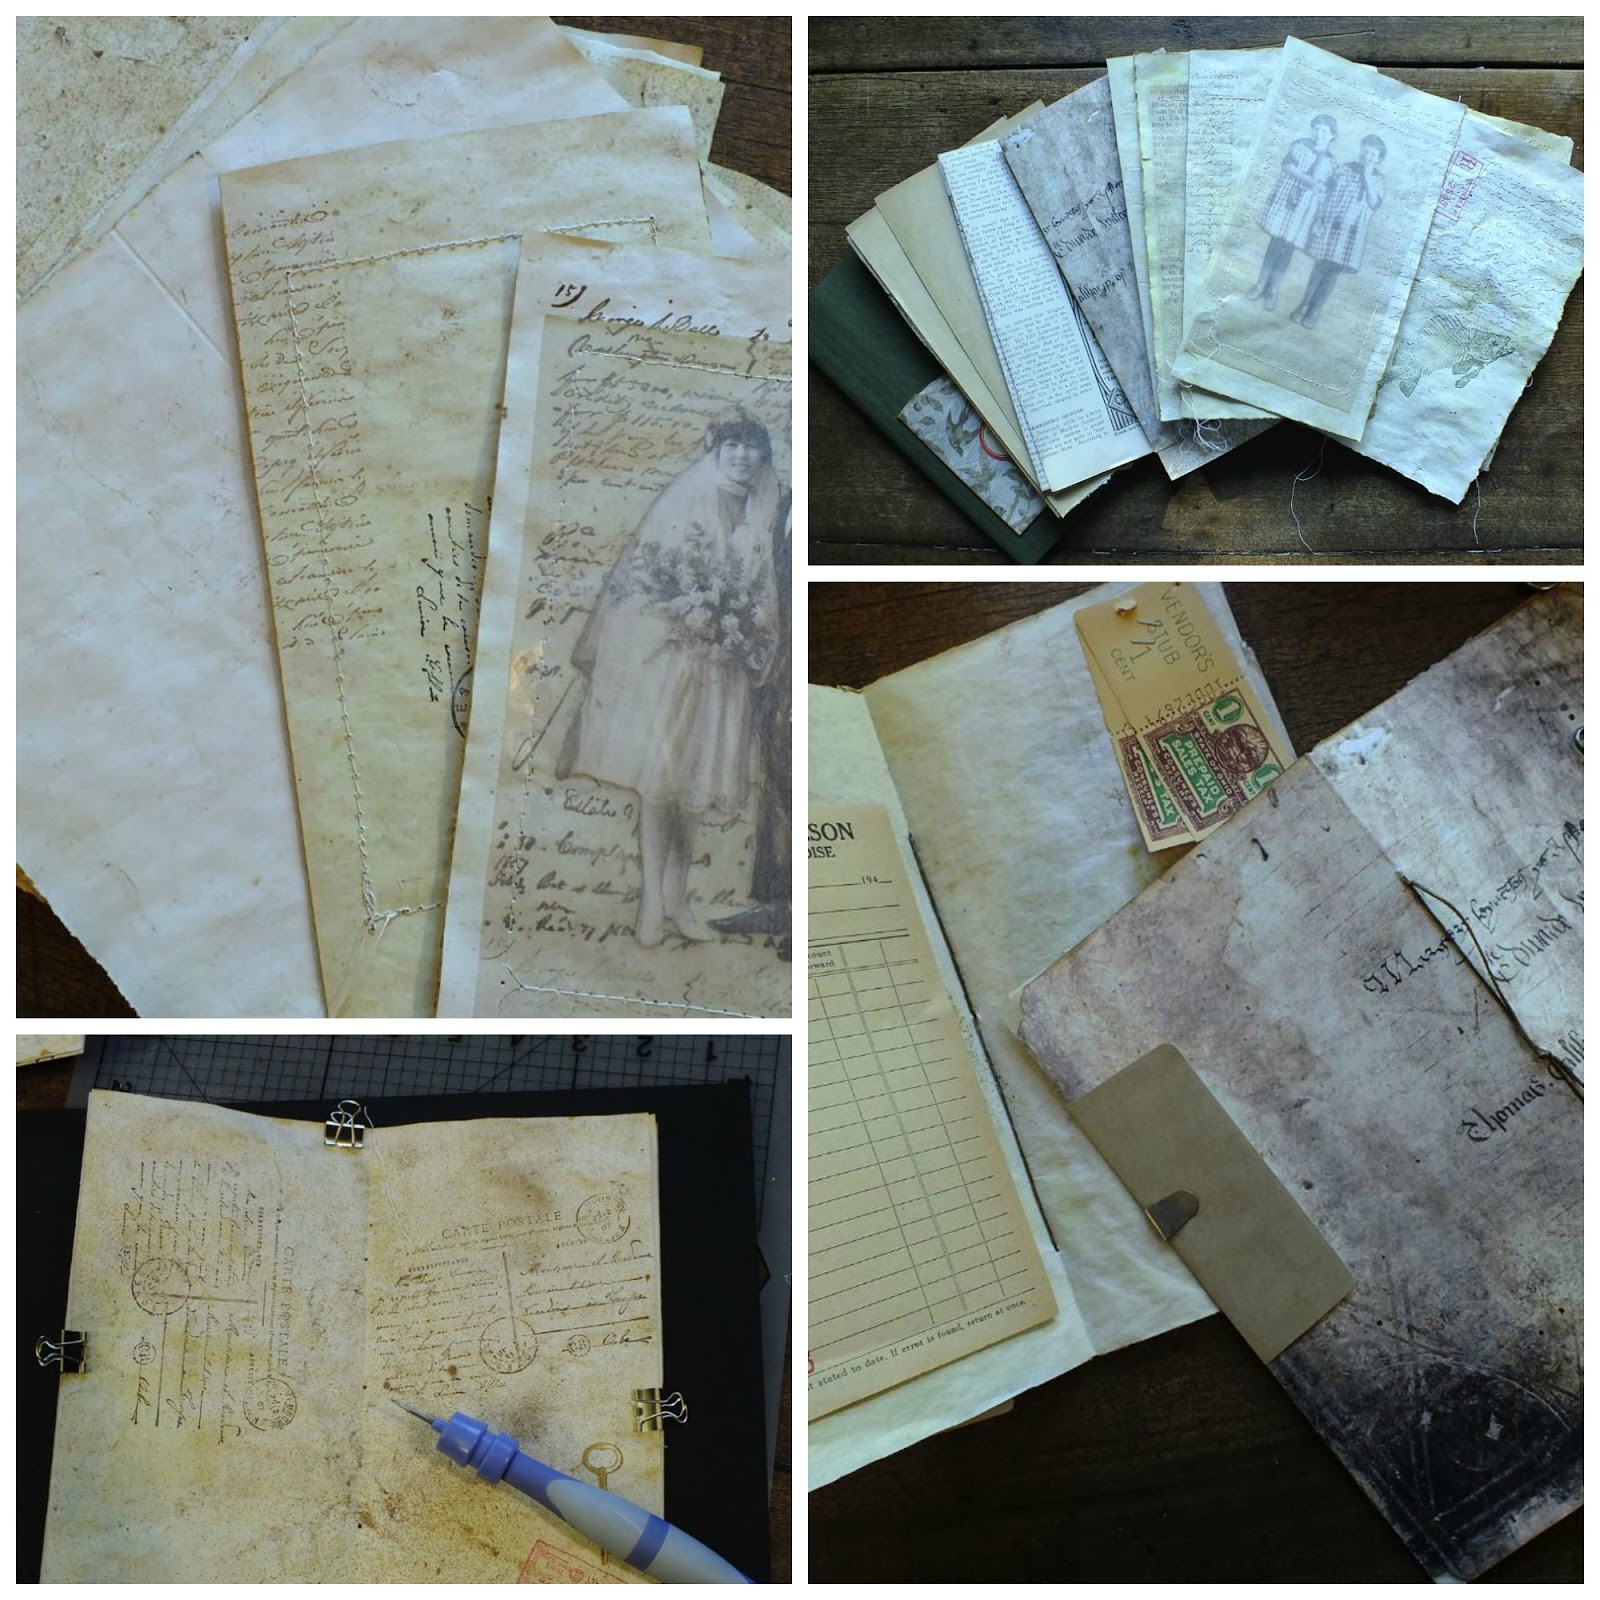
The papers I'm using are from the Graphic 45 Botanicabella set.  I started by covering the covers front and back (interior and exterior really).


At first I was planning to stick with the crackle design for the front cover and embellish it somehow...


... but then I decided to jazz it up a bit with this fabulous panel cut from one of the papers.


And then I covered my toilet roll "pocket pages".  If you want the same paper design going across a double spread, this is when you have to start paying attention a bit to make sure you get the right papers the right way up, front and back, on the right sequence of rolls.


If you don't mind having different papers facing each other, you can relax for a bit longer.  I've made albums both ways, but for this one I'm going for the double page spread, so I need to keep my pages in the right order from here on.


Next up, it's time for some more leftover cardboard.  I cut pieces to fit as the inserts for my toilet roll pages.


Once you have one cut to size, you can use it as a template for the rest.


Then more decorating.  Again, I'm keeping my pages in the intended sequence at this point, paying attention to front and back to make sure I get nice contrasting designs sliding in and out.


I think it's nice to have the inserts showing a little way outside the pockets - that's why I made the exterior covers that bit wider.  But you can also choose to have them tucked a bit further away, and use metal tabs to get hold of them.


Alternatively, you can use a punch to chomp a semi-circle out of the edge of your pocket so you can just grab hold of the internal tab and pull it out.  It's entirely up to you really - I'll link to some of my older toilet roll albums at the end of the post so you can see what I mean.


Time to work on the "binding".  Again, there are various options - if you check out my very first toilet roll album, I used a hole punch and a book ring to bind my pages, simple but effective.  Two holes and two book rings will mean a more stable book, obviously.


But most often, I've used concertina'd cardstock to create my binding.  I find a fold of about a 1cm depth works well for these size pages, and then I just keep folding until I have enough slots.


You need one strip each end to glue to the cover wall, so don't forget to leave enough for that.  That means for my five pages I need seven slots in total.  So if you've got four pages, you'll need six slots; or you'll need eight slots for six pages etc.


Add glue to each end strip and plenty in the spine of the cover and press the concertina into place.  You can adjust a bit to make sure the slots are evenly spaced and then apply pressure while the glue dries.


I sanded all the edges - pages, covers and inserts - and at this point I would usually ink everything up.  But I decided I rather liked the white edging...


... so much so, in fact, that I decided to go for more white-washed look overall.


So then everything got a wash of white acrylic for a more shabby-chic effect.  I really like how this just softens the look quite subtly.


Once everything's dry, and the concertina is firmly stuck down, you can glue in your pages.


You just want a stripe of glue right in the bottom of each fold - like a river running through a valley (sorry - I don't seem to have taken a photo at this point).


Then glue the ends of the pages in place, and hold them until you can feel they are firmly attached.


And there you have it - all your pages ready for adding photos, memorabilia, quotes, notes, even some stamping if you want.


I've added some sari ribbon to make a simple closure.  (You might recognise it - I used the same ribbon for my Love This Life inspiration album for the Mini Album Makers challenge this month.)


For now it's not glued on, as I might want to add some more embellishing but, when I do, I'll glue it at the spine but not across the front cover.


That way, when you undo it you will still see the full glory of the papers.


Let me show you quickly what I mean by the "double page spread" in case I wasn't clear...


The opening page is single-sided, facing the inner cover.


Each page spread has the same papers on facing sides.


And each tab contrasts with its page, but matches the tab opposite.


It's only the front and back covers where you have different papers on each side.


But that shows how it looks if you choose to vary papers on every side.


You can add journalling panels and cards to the pockets too, there's plenty of room.\


And of course the inserts give you even more space for adding pictures, journalling and/or extra ephemera.


But I think this tutorial is plenty long enough already, so I'm going to leave it at this stage...


... ready for all the internal decorating to happen in your imaginations.


I hope you're inspired to make a toilet roll album of your own.  It's really very satisfying turning trash to treasure like this.


If you want to check out a few more of my examples, take a look at the links below, but you'll also find them all over YouTube and on many craft blogs.


Thanks so much for joining me today, and we hope you'll come and play along in our November challenge.  Any handmade book goes, and you could win a fabulous prize from this month's sponsor Lindy's Stamp Gang.


We hope to see you soon!

Alison x
Words and Pictures