Hello everyone. My name is Margaret Mifsud from MargyzPaperGames and I am so thrilled to be a Guest Designer here today! A little about me. I live in Australia .. South Australia, to be exact, and hubby and I have been empty nesters for many years now. We have two wonderful sons and three amazing grandchildren. I started making my own cards about 12 years ago and still enjoy doing that. I also do a little Art Journaling and have created quite a few mini books as well. It is such an honour to be able to share my book with you here today. There is so much inspiration shared on this fabulous blog each month and I hope I am able to contribute a little more for you today.
I've been wanting to create a masculine style mini album for a while now and thought that this would be the perfect project for this post. First I will show you some of the finished pages and then I will share a few hints and tips on how they were created.

The outside of this album measures 5.5 x 6.5" and the inside pages are 4.5" x 6". The spine is 2" wide. The papers I've used are a mix from Studio Light's Industrial 2.0 paper pad and Kaisercraft's Factory 42 paper pad.

The inside cover and the first page set. I haven't done much embellishing in this album but I have added a few cogs here and there and a little bit of washi tape as well. I have also stamped some splatters and coffee stains, added a little stenciling and inked the edges of all the papers with Ground Espresso Distress Ink.

I created two sets each in two different styles of pages. So, there are 4 page sets in this book but, as you will see, there are a lot of places for photos, etc. This page set opens up firstly to the left ..

.. and then there is a page that lifts up to reveal a folded card ..

.. which is tucked into a side opening pocket attached at the back.

You've probably noticed that I've added a few of Tim Holtz's Snarky Small Talk Stickers to this book. It would have taken way too many photos to give you a close up of those but, if you're interested, simply click on the pictures and you should be able to read them properly.

This is the back page of the first set and the beginning of the second. I have used a stacked hinge to bind my pages to the spine and have left a gap of about .25" in between each set so that the pages will sit nice and flat when opened. If you would like to know how to create a stacked hinge, Claire Charville has a wonderful video tutorial HERE. A little TIP from me: As well as the double sided tape Claire uses to hold it all together, add a line of wet glue just for extra strength.

The back page of the first set has a double belly band which is held down by some magnets ..

.. and opens up to reveal another photo mat. All of the above mats and pages are attached to, and held by, a single hinge. This is why I added a line of wet glue. It takes a bit of extra strength to hold all that weight!

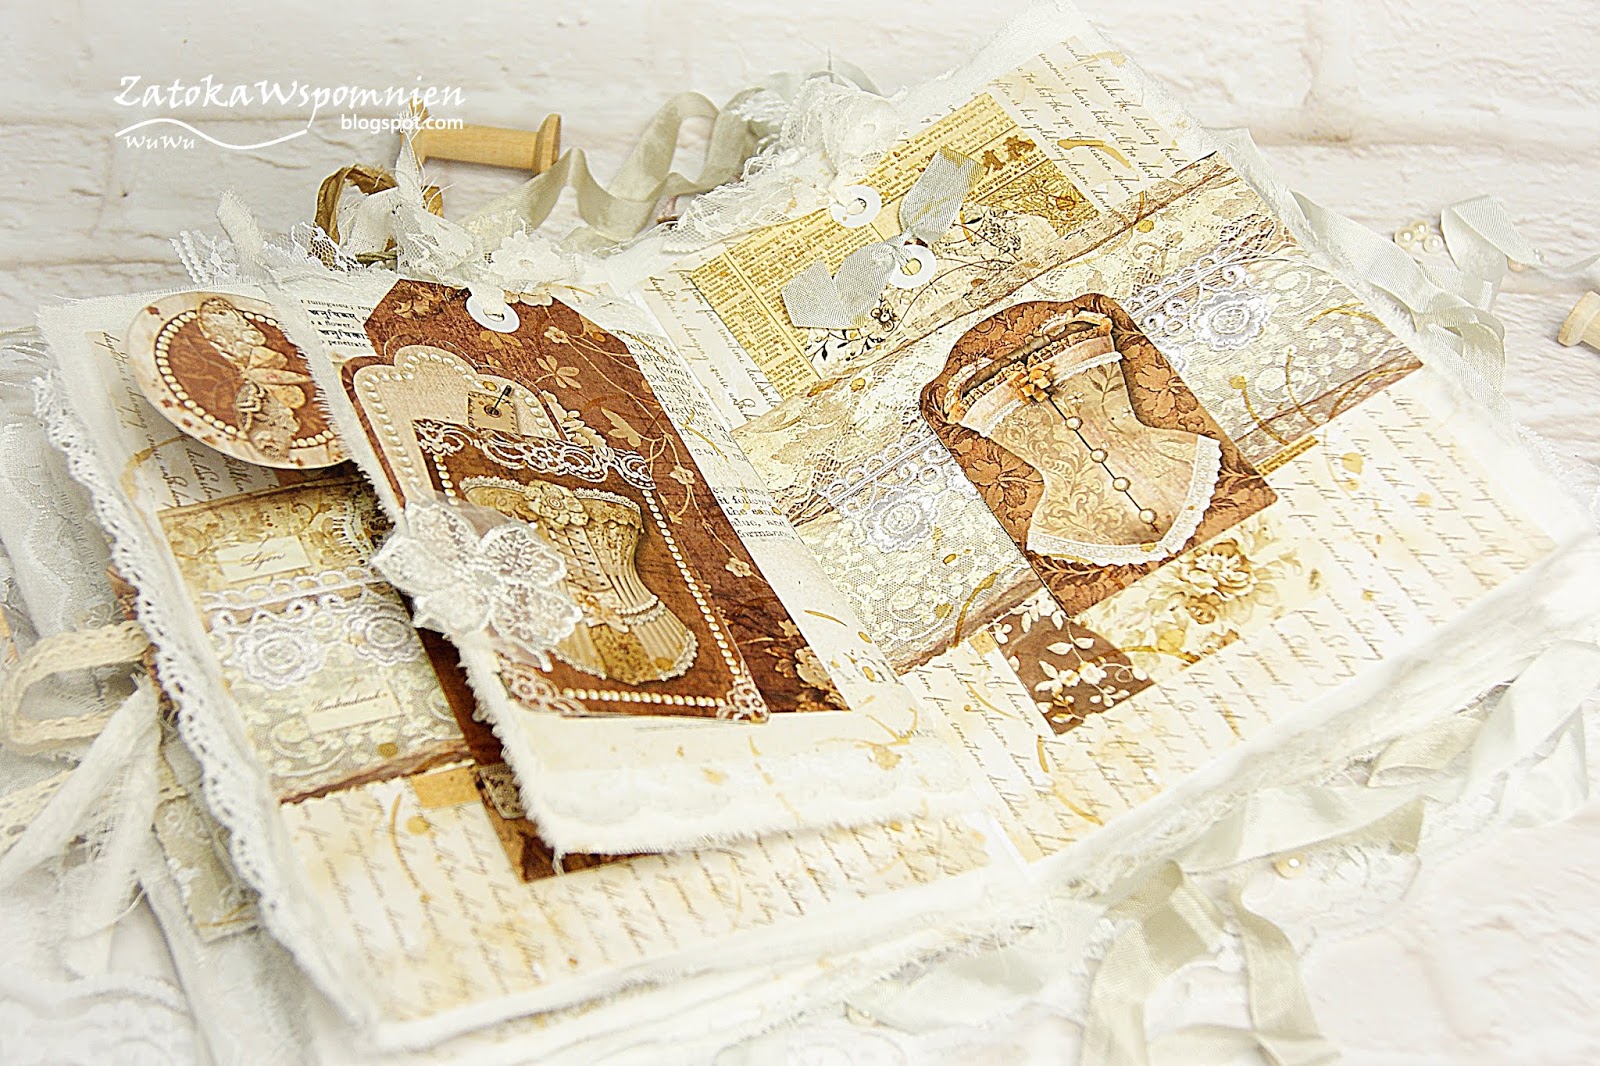
The second page set opens out to the right, and there is another underneath which opens out to the left. It also has a folded card tucked into a top opening pocket which is attached at the back of the set.


The back of the second set and first page of the next.

This little flip up is actually a double photo mat (or journaling spot) ..

Having shown you the two different page sets I will give you a few insights into the constructions. It starts very simply with a base page. (The red dotted lines are the score lines) I tried to take photos as I was making the book itself but the black cardstock made it difficult to see the details so I cut it all out again in kraft card.
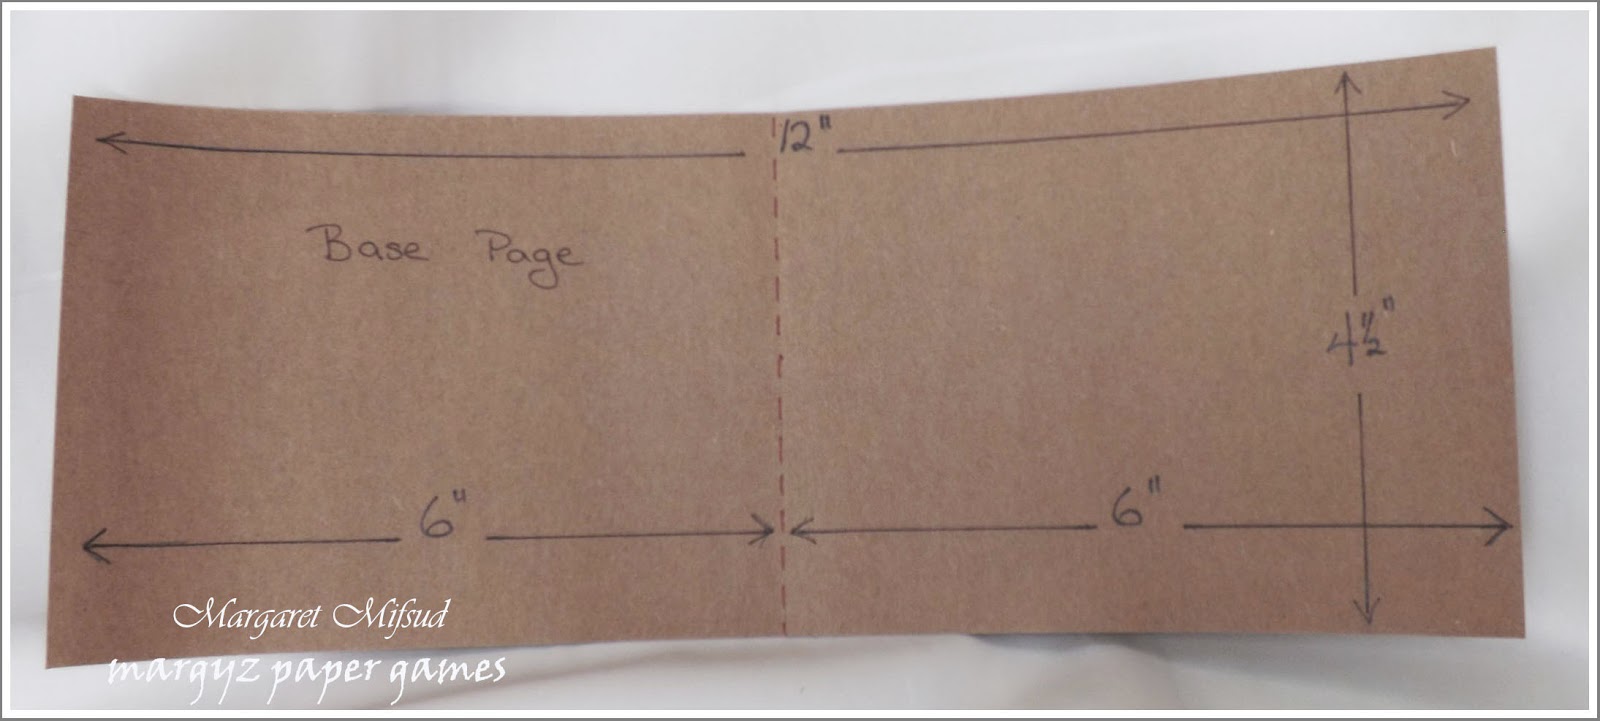
I have shown the dimensions of the ones I created but, of course, you can make this any size you like to fit into your book. When I started this album, I knew I wanted some interaction but wasn't really sure what kind of interaction so, by starting from this base page, I simply added the sections one by one as the ideas came to me. Adding the pieces to your base page one at a time gives you the opportunity to create any kind of interaction you like. You simply need to keep in mind the dimensions of your base page and make your pieces to fit.

For an example, I wanted a page that would lift up to reveal extra photo mats so, I cut a piece to fit and attached it to the inside, top right of the base. This is a full sized page so I just added an extra half inch at the bottom for the hinge that attaches to the base as shown below. This page will actually fold down inside the set and the hinge won't show as it will be covered with the papers used to decorate the album.

Deciding that I wanted a place to tuck in a tag at the side, I cut another piece of cardstock to create a pocket at the back. Again, you simply need to cut your cardstock to fit the page remembering to add that half inch wherever it needs to be attached to the base.

TIP: Before adhering it in place, cut a small wedge from each end of both hinges.

It makes for a neater finish at the end. Do not close either end of the pocket at this stage. The bottom of the pocket will be closed when the page set gets attached to the book hinge.

So, I also wanted a belly band, but I didn't want to lose the photo mat underneath it so I created a hinged base for it, attached that to the top of the pocket and then added the belly band on top.

The bottom end is left free so it can be raised but, to stop it flying up when you open the page, it can be held in place by a couple of magnets. The second page set was created in the same manner. I won't go into too much detail as you all know the basics anyway. I will just show you what I did.

I added a page that opens out at the side ..

.. and added another pocket at the back. Instead of opening at the side, this pocket opens at the top. TIP: Make sure you trim away the corners so the hinges don't overlap otherwise it gets too bulky.

When attaching this pocket, only glue down the bottom and one side. The other side is left open to attach to the book hinge.

The last piece I added is the folded flip up. You only need a hinge on one side so make sure you trim away the half of the hinge you don't need. I mentioned that the page sets are attached to the album hinge by the pockets so I will show you how I did that.

When you add the double sided tape to both sides of each hinge, it is a good idea to trim away a small wedge shape at each end. This makes it easier to slide the pages on.

For the side opening pocket, you simply need to remove the covering paper from both sides of the hinge and then slide either end of the pocket over the top. Make sure it is seated properly, and then press down firmly to glue it in. I say either end because it really doesn't matter which end is attached to the spine. It depends on how you want your pages oriented. You can make two page sets, exactly the same, attach each one to your spine from a different end and get two sets that look completely different!
The other page is attached in the same way. With this top opening pocket, the only thing you need to make sure of is that you have it the right way up. You don't want to stick it all down and then discover the opening is at the bottom. Although, I'm sure there is a way to use it regardless. I won't show you the rest of the book as this post is already way too long, but I will just show a little more detail of the cover.

The cover is made of chipboard. As you can see I used a piece of hessian style material to cover the spine and, although the material is glued down, I added the brads for some extra interest and strength. After all, this is a man's book and is going to get some rough handling! LOL!!
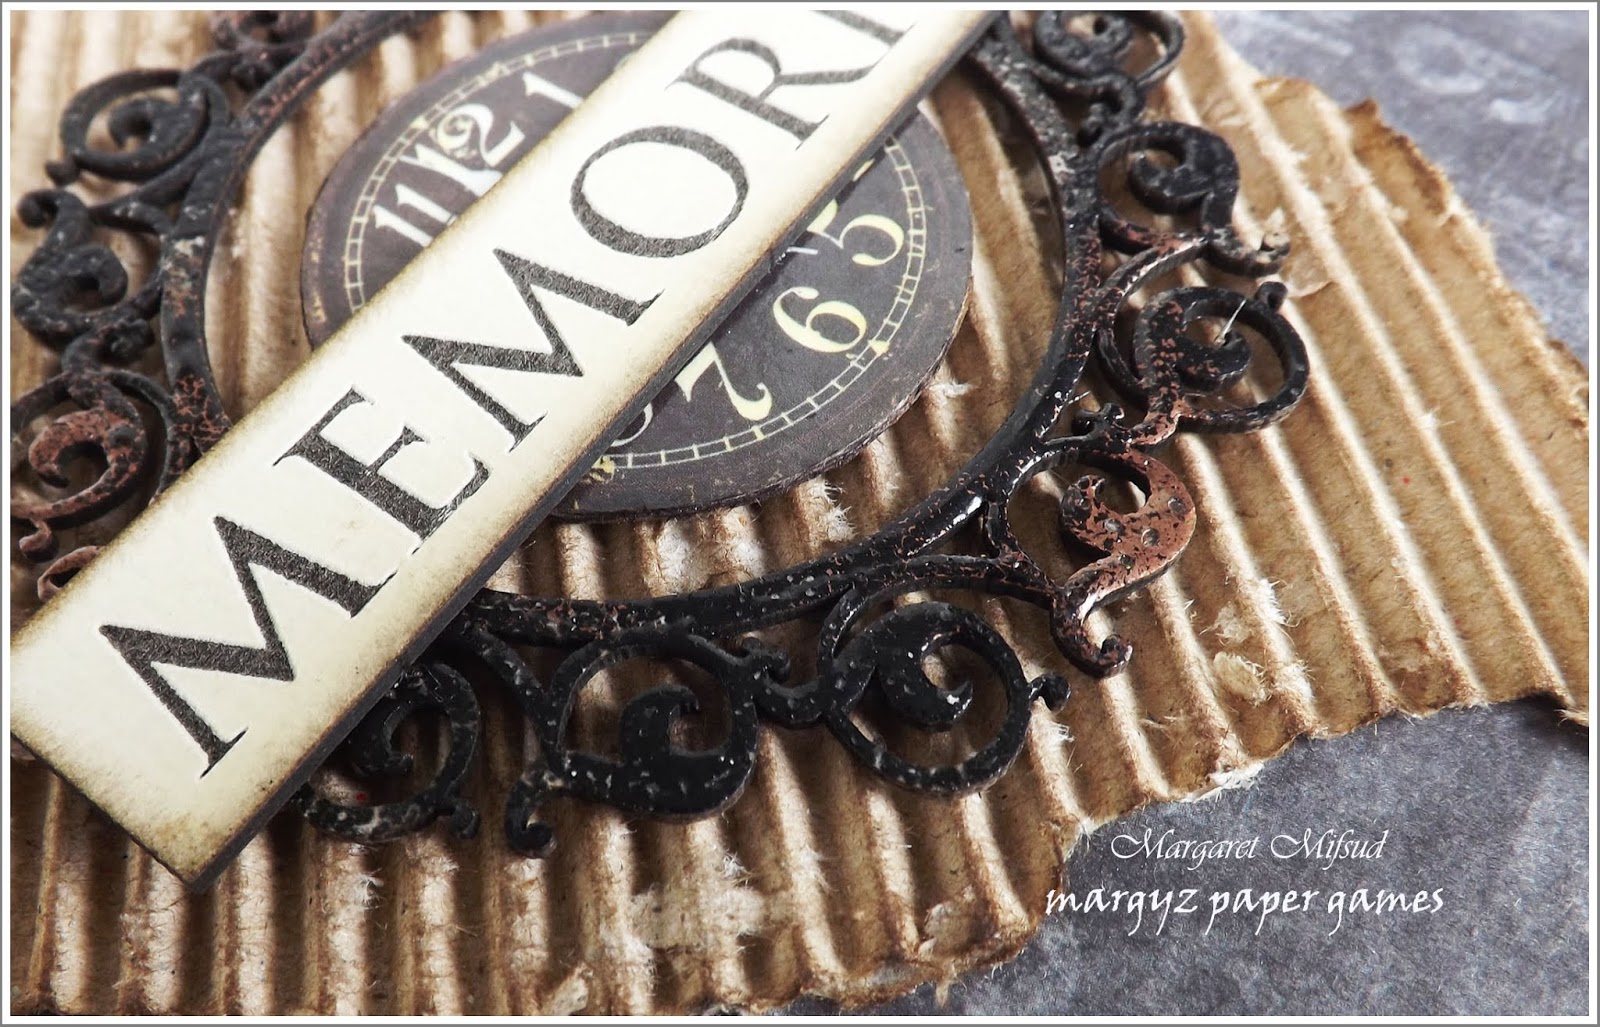
I used a piece of corrugated board under a chippie frame by Little Birdie and a word strip by Scrapmats, to decorate the front of the book. The frame was heat embossed with a mix of black and bronze embossing powder and the word strip was edged with Ground Espresso Distress Ink. The chippie decorating the spine is also by Little Birdie and was heat embossed similarly to the frame on the front.

I hope I have given at least some of you a few new ideas and I want to thank Autumn and all the ladies on the Team for giving me this amazing opportunity. I will be showing the whole of the book in a later post on my own blog so I hope you will pop in to take a peek.
Happy album crafting everyone!
Take care and God Bless
oxox Marg


