Monday, May 21, 2018

Wrap Journal Tutorial by TekillaNik

Hello everybody. Masha from TekillaNik with you today.  I am very pleased to be a guest designer in this beautiful blog. With pleasure I created a mini album for inspiration.  Bright and mischievous, but really girly. Believe me, not all girls are ladies and princesses!  I know a couple of bandits!


The design of the album is simple.  The base is an A4 sheet of watercolor paper.  We use a ruler and a scoring tool to score from left to right - 11 cm + 1 cm + 11 cm +1 cm + remainder.


That's what the foundation looks like when it's assembled. Everything is simple, as you can see.


A little clue. To accurately calculate the size of the substrates for photos, we need to take any draft, and in the corner to make hole holes for the photo. A photograph (of any desired size), in my case 10 x 15 cm insert according to the angle.


And now we measure the distance of the substrate.  In my case this is 3 mm.  That is, on each side it is necessary to leave an additional 3 mm.  It turns out that each substrate for photography 10 x 15 cm will be 10.6 x 15.6 cm in size.


Here are a few substrates just ready.


After the base is already decorated with scrap paper, I make a strap that will later hold the photos.


 The substrate for the photo 9x13 cm glues to the base, thereby covering the tail of the strap.


Next we will attach the remaining substrates.


That's the kind of kid I finally got. We're watching.


Thanks for looking and make sure to check our the May challenge for a chance to win a $25 gift certificate to Lindy's Stamp Gang.

Monday, May 14, 2018

Flip Album Tutorial by Anne Redfern


Each month a member of the Design Team shares a tutorial and I would like to share with you my very first Flip Album.  I was lucky enough to attend Creativation this year and saw quite a few Flip Albums and that really inspired me.  There are many tutorials on YouTube for inspiration too.  This is my own take on the Flip Album and I am really pleased with the way it turned out.  I do hope you will enjoy my tutorial!

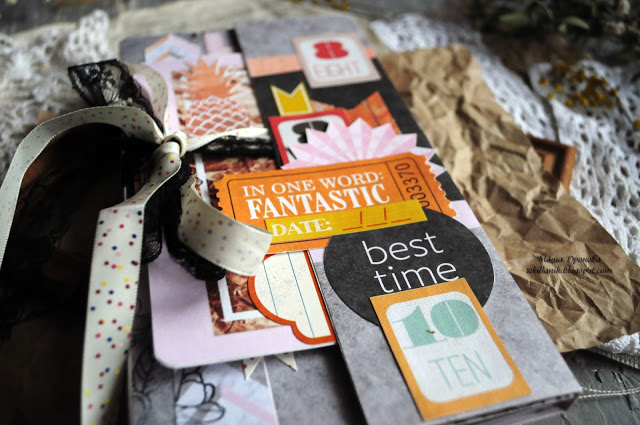
The finished album, it measures 6.1/4" x 4.1/2".

1) Cut two pieces of thick card or mountboard to 6.1/4" x 4.1/2" and one piece at 6.1/4" x 3/4"
2)  Apply binding tape to three sides of the larger pieces (see tip at the end for stockist).
3)  Join the centre strip, using tape again.  Leave a gap between the pieces to allow the album to open and close easily.  Run a ruler gently over the tape in the gaps.
4)  Choose your design paper (DP) to cover the inside and outside of the album.  I chose Prima (Engraver) that I have had in my stash forever! 


5) To cover the front of the album, cut two pieces of DP to 6" x 4.1/4" and one piece to 6" x 1/2", ink the edges with distress ink and apply to the outside of the album with your tape/glue of choice.


6)  For the inside of the album I cut DP, again to 6" x 4.1/4" and one piece to 6" x 1/2", again inking the edges before applying to the inside of the album.


7)  To make the flip element, cut 5 pieces of black card to 4" x 4.1/2" and score each one on the long side at 1/2".  


8)  Cut 10 pieces of DP to 3.3/4" x 3.3/4" and ink the edges with distress ink
9) Cut 5 pieces of DP to 3.3/4" x 3/8" if you wish to cover the flap on the inside strip, this is not necessary - I just like how neat it looks (see below).  You only need these on the underside of the flap as the top side will be glued to the album.


10)  Add the topper pieces to each side of the five flaps.  I rounded the edges of each of the mats and toppers, but this is just personal choice.


11)  Starting at the top, line up the first flip with the top of the inside cover. 
12)  Using the first flip as a guide, continue adding the flip pieces, butting each flip to the one above, until you have all five flip pieces in place.  You need to do this part carefully so that the flip elements are all lined up evenly.


13)  To make the envelope pocket for the left hand side of the album, cut a piece of black card (or colour of your choice) to 5" x 5.3/4".  Score on each long side at 1/4" and again at 1/2".  Score on one short side at 1/2".
14)  Trim the lower side of the pocket as shown above to reduce bulk when folded.
15)  For the envelope closure cut a piece of black card to 4.1/4" x 4".  Score at 1.1/4" and 1.1/2".


16)  Cut a mat from DP to 3.7/8" x 5"
17)  Cut a mat for the closure flap to 1" x  3.3/4".


18)  Fold the pocket along the score lines to form the envelope and add the DP topper.
19)  Fold the closure along the score lines and add the DP.
18)  Glue the top flap in place first, lining up with the top edge of the album cover.
20)  Fold the envelope part, score well and add this to the album, lining it up with the bottom of the album cover and also the closure top (to look like the picture below).
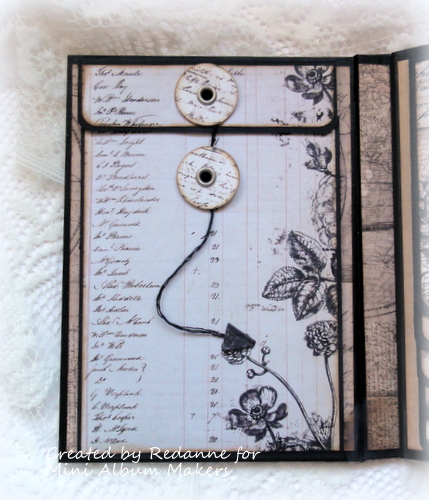
21)  If desired, add an envelope closure to each part, you could just as easily use magnets here or any other closure of your choice.  I simply cut two circles and added them to the closure and the pocket with my Crop-a-dile, later adding some string for the closure element.


A view of the assembled pocket.


22)  For the cover, I chose to decorate it with a beautiful frame - Doodle Frame Rectangle by one of our lovely Sponsors - Gypsy Soul Laser Cuts.  I used three parts of the frame, the two large shapes and the thin oval piece.


23)  I used four embossing Powders by Emerald Creek, three of them are from Seth Apter's new Baked Texture range (Rocky Road,  Ancient Amber and Vintage Beeswax) and one from Kim Evans' Classic range - Midnight Black).


24)  The larger frame was embossed with Midnight Black, the smaller topper frame was embossed with Rocky Road and the small oval was embossed with Ancient Amber. The contrasts between the smooth embossing powder and the chunkier one looks very effective.
25)  The butterfly is a Tim Holtz stamp, I simply stamped it in Ranger Black Archival ink and embossed the whole butterfly with Seth's Vintage Beeswax Baked Texture.  I just love the tone that the embossing powder gives to the butterfly, it looks so natural in real life.

My apologies for the length of my tutorial, I wanted to show and explain as many elements as possible.

Hints and Tips:
# Cut (and edge) all your elements before you start and then you can enjoy the assembly part.
# Be precise with your measuring and cutting, the flip elements will look neater that way.
# When you are assembling the album covers, run a ruler or bone folder gently down the joint pieces to ensure that they are flexible and there is plenty of room for covers to open and close - I was not very happy with my first effort so I re-did mine, it was worth the effort!
# The black tape I used was purchased from Clare Charvill, Ambassador for Graphic 45.  In the UK you can purchase it HERE.  Clare also shares a video on how to use the tape.  I am sure there must be something similar sold elsewhere, it saves painting all of the borders of your album (the tape can be painted over too).


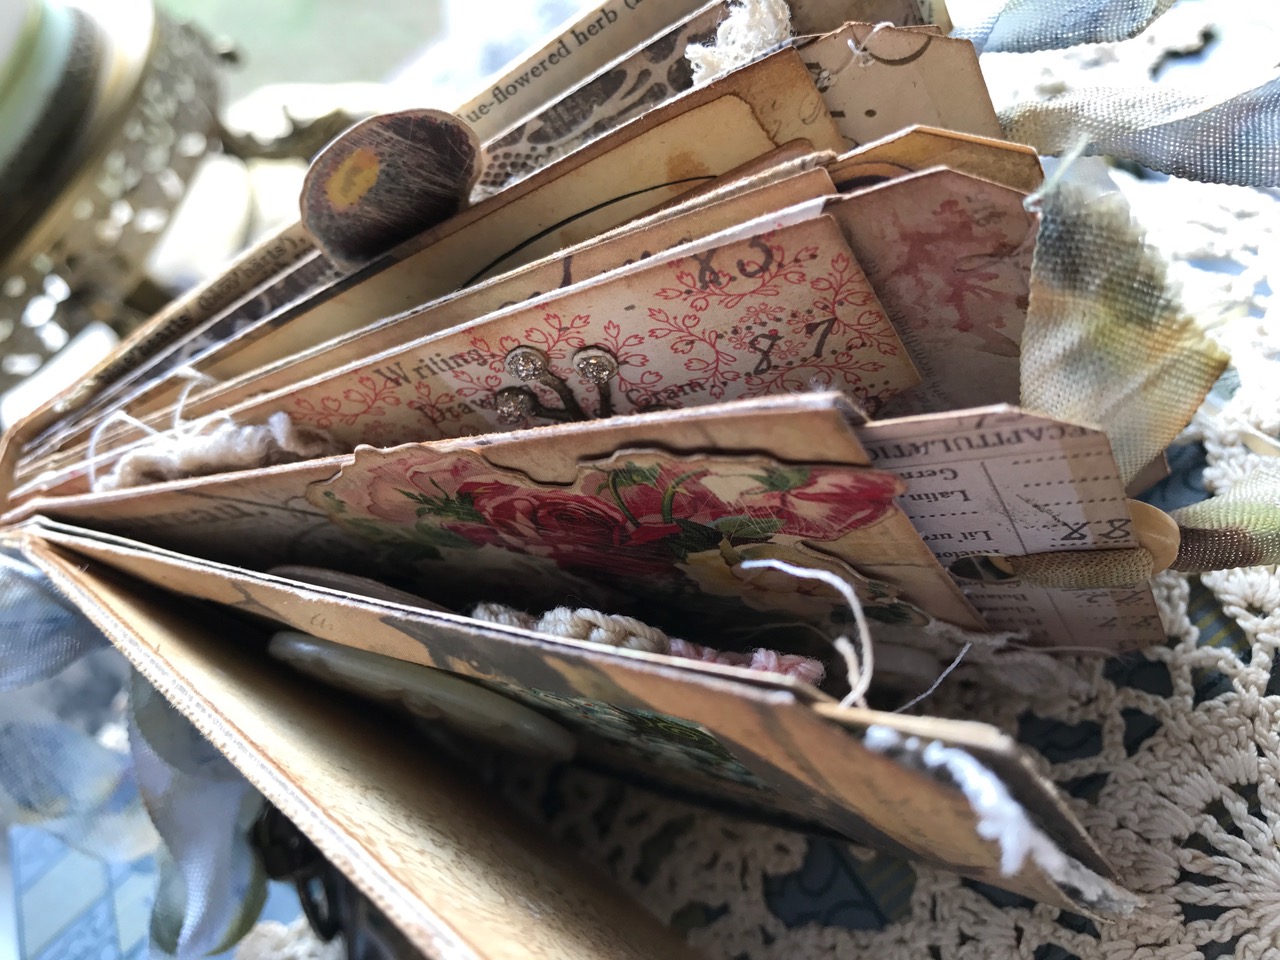
A final view of the inside of the album.

Thank you so much for taking the time to visit, I appreciate any comments you may wish to make.  If you have any questions, please leave them in the comments and I will do my best to answer them.

We hope that you will join in our challenge this month, you can find all the details HERE.  One lucky winner will receive a $25 gift certificate to Lindy's Stamp Gang.  Come play along!

  Anne  xxx

Monday, May 7, 2018

Winners Post for April 2018

We are so encouraged by the support you've given and projects you've shared!  April's challenge produced a wonderful array of inspiration.  Thank you so much!  If you have yet to review the April challenge entries, please visit the post for some amazing inspiration.  It's never an easy job to narrow down to a few winners, but without further ado...


The overall design team favorite badge goes to Stacy Hutchinson of Tattered Nest!  Stacy, we would love to invite you to be our guest designer for the month of June.  Please email Autumn at teamclark@rocketmail.com to discuss further.


We adore your wee album Stacy!  With so many incredible collage elements, all pieced together in vintage perfection, it is a masterpiece!  The tutorial you shared was so useful and we all want to make one of our own!  We can't wait to have you featured on this blog.


Our top five entries are just as amazing.  Each of you, please take our top five badge and display it proudly on your blogs.  In no particular order...


Nuneka of Meraki Spirit, who recently graced us with THIS fabulous tutorial, has wowed us again with these two stunning travel books.


We really enjoyed seeing the two different takes on this tutorial.  An album for all occasions indeed!


Elena Mashkina of Myscrape shared a delightful spring themed mixed media notebook.  If you have fears of binding, please take note of Elena's simple ring binding.  We welcome your works in any style.


We were fascinated with your page collages and unique inserts.  What a treasure!


Deb Riddle of Paxton Valley Folk Art made not only an artistic, but useful journal of her favorite rusting techniques!  Rust lovers will certainly want to take a page out of this book.  :)


Deb, we were delighted that you shared so many step outs for your process.  Each page will continue to inspire.  An amazing idea!


Maria Lillepruun of Magic Attic Design joins us again in the spotlight.  Maria's gorgeous green journal is a study in texture and composition.  We adore it!


The handbound journal is filled with many charming details, a picture of spring...


And we have Aurora Aurelia of Eos' Crafty Room who's beautifully coloring is the star of the show in this album.  The pages and interactive elements are so beautiful!


Make sure to check out the incredible video flip through.


And thanks to each of you who played along.  And now, the announcement of the winner of the treasure trove of Gypsy Soul Laser Cuts chipboards...


And the winner is.....


That's Magic Attic Maria!  Biggest congratulations! Please email Autumn at teamclark@rocketmail.com to claim your prize.  We hope you are fully inspired and will play along with our May challenge for a chance to win a $25 voucher to Lindy's Stamp Gang.  Join us next Monday for a fantastic design team tutorial by DT member Anne.  
You are invited to the Inlinkz link party!
Click here to enter

Tuesday, May 1, 2018

May Mini Album Tutorials and Challenge

As we say farewell to April, our hearts are overflowing with thanks for the tremendous support you have given to our challenges thus far!  Make sure you visit the April challenge HERE to see all of the beautiful entries.  Sadly, today we are saying goodbye to DT member Gloria Stengel.  Gloria, thank you for your wonderful projects and support!  We wish you the very best.  That leads us to a Design Team Call...


I’m looking for a couple of makers (bloggers only) to share design team duties which include:
1. Creating one mini album per month (with options for months off).  One photo will be shown on the challenge post and a tutorial will be added to your personal blog.  Your project will be due by the 25th and posts will go live on the 1st of each month.
2. Rotating with other DT members to post one complete tutorial on challenge blog within the year.  You will add one photo on your personal blog and link to the tutorial on the challenge blog.
3. Commenting and supporting challenge entrants.
* The term is variable, though we request a one month notice before leaving the team.

Please email Autumn at teamclark@rocketmail.com with questions or applications.  Include your blog and social media links with a permalink to your favorite handmade book(s).  Please note this is a teaching blog and all projects, even if they are CASEd from another designer, must be tutorial based (photos or videos).  Applications will be taken through May 15.

As 2018 continues along, we launch a brand new challenge with a super sponsor, Lindy's Stamp Gang!  One lucky winner will receive a $25 voucher for the Lindy's website!


Our team is working hard to provide you with an amazing variety of mini album tutorials for your inspiration.  Hop around to each designer's blog for the full reveal and tutorial.


I designed an album with G45 Nature Sketchbook papers that will perfectly fit up to 26 4x6" photos.  Each envelope style page has a pull out that houses a double-sided photo mat.  Come and see how to make this brag book for your favorite photos at SewPaperPaint.


I recently returned from a trip to Australia and before I left made myself a little notebook to keep my memories in.  If you want to see how I made the cover and how I did the inside pages, there's a full tutorial on my blog.


Nancy


I adore file folders! There's so much you can do to alter and add pages to them. This month, that's just what I did with the one you see above.  Please visit my blog (Art-From-The-Heart) to see what & how.


Alison


I've been playing with some of the Lindy's Stamp Gang sprays to create the shimmering look on my Clockwork Notebook.  Do come and visit me at Words and Pictures to check out all the details in close-up and find out how I made it.

Anne

During a 'purge' of my craft room I found some chipboard ATC bases.  I used several Stencil Girl stencils and Lindy's Stamp Gang sprays to create my mini album.  You can see more on my blog.


Gloria

I have created a long and skinny mini album using Graphic 45 policy envelops and washi tape!  Every envelope contains a large tag!  To see how I constructed my album, visit my blog Scraps of Life.


Hi! I used Stencil Girl stencil, Gypsy Soul Laser Cuts chipboard and Lindy's Stamp Gang sprays and recorded a video tutorial for you. You can see more on my blog.

**********************************************

I hope these peeks have sparked your imagination and you will pay the design team blogs a visit plus play along with our challenge, which ends at 11:55 pm EST on May 31.  Join us on May 7 for our April winners announcement.


Our challenge follows a few simple rules:
Any Handmade Book Goes.  Enter any form of handmade mini albums, scrapbooks, journals and book arts.  Our focus is on completed works, so no layouts or journal spreads that are not part of a complete handmade book project.  You do not have to provide a tutorial, but we wish you would.  Feel free to use one of the DT tutorials to make your project and give proper credit where due.  No back linking allowed.  You must add our badge to your post and link to our challenge to be eligible to win the prize.  Combine with any other challenges as applicable.  No limit on entries.  Permalinks only and no back linking.  Share the love by visiting and commenting on other entries.  Please become a follower.  That's it - have fun!

* Make sure to add our badge to your post *
and link back to our challenge. 


*NEW*
Submit your entries to our Facebook page for extra love.
Tag us @minialbummakers with your entries on Instagram for a repost.

Please note: This is a public blog and by linking your project you agree to have your name, blog link and the creation you linked posted shown on this blog and other Mini Album Maker Challenge social media sites. If you do not agree to this, please do not join in the challenge. Also, remember that any comments and/or linked projects left on this blog will be visible/clickable by third parties as this blog is public.  We will not share your information willingly for any other purposes.  (This was posted to be in compliance with the new GDPR law that will soon become effective in the EU, and will also apply to blogs located in the US if blog visitors reside in the EU.)


You are invited to the Inlinkz link party!

Click here to enter