Friday, December 14, 2018

Cascading Christmas Mini Album by Jennie Atkinson

Hello Everyone! Jennie here welcoming you to the last DT tutorial of 2018. Where has that year gone! We really are now in the run up to the holiday season and I hope you might be finding a little time for some crafting in between all the preparations. I decided to share with you this month a mini album with a Christmas theme which is relatively simple and "clean" to put together (just scissors, glue and a little Distress Ink). So if you have a some spare time you might want to give it a go!


We don't get many visitors over the Christmas and New Year holiday but it is always nice to record who has been and what we did (normally the games played!).  A number of crafty friends have been sharing books on the internet for their Artist Trading Coins just lately and I thought the size would make a lovely visitors book for the Christmas tree table.


Sometimes you purchase a set of papers and they are just crying out to be fussy cut and used just as they are. I fell in love with these vintage Christmas papers and I hope you like them too. The pad is full of gorgeous papers, tags and labels and sometimes it is hard to make the decision as to which side of the paper to use! First I will share the photographs of the finished book before giving a short tutorial on how the book came together.


I have used a magnet to close the book which is quite chunky!


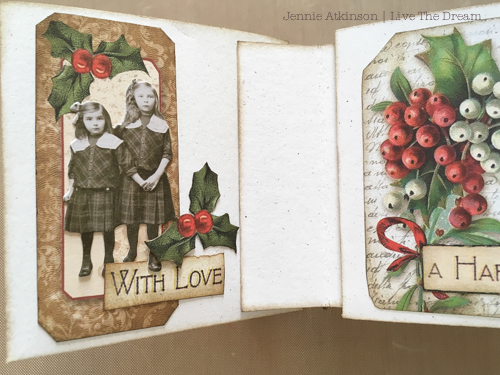
Once opened the pages can be seen separately .....


or pulled out on it's waterfall binding.


Finally, a few colourful tags. And here is a video flip through along with some lovely Shetland Christmas music.  


As I said the the mini album is based on one widely being made on the internet for Artist Trading Coins.  I have used the specifications as Teresa indicates in her video and made the mini album in exactly the same way.  Here is a link to the video based tutorial I used to make the album:


I made the pockets first using a fairly thick white card. I would normally distress the edges with Vintage Photo Distress Ink, but picked up the wrong ink pad ....... Walnut Stain, which I have not used in ages. The result was I fell in love with it all over again! Fortunately the smaller tags all fitted nicely on to the fronts of the pockets and I was able to fussy cut some sentiments and other little bits of holly and berries.


I decided to stick these onto the waterfall binding before decorating the reverse of the pockets as I wanted to see how much room I had first. Again I have used the same papers and ink for the binding.


There is much less room on the reverse side of the pocket for decoration, but there were some lovely bits of text and other small tags within the paper pack.  Some of the smaller Tim Holtz Paper Dolls were a perfect addition too.


Some of the tags are quite large but oh so beautiful !!! To make them fit the inside cover of the mini album I made a cut in the tag .....


..... cut a small half circle in the lower part .......


...... then inked the edges to make this lovely pocket.


It really suits the inside cover and is a good "trick" for making larger items fit smaller albums!


It also meant I could hide the lace edges which were decorating the front cover.


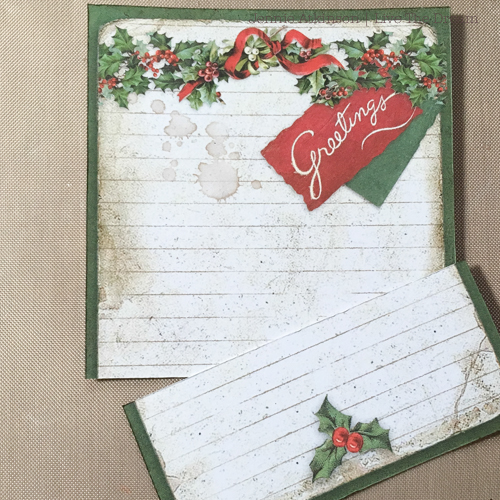
There were lots of little bits of strips on the 12 x 12 papers which I thought would be perfect for decorating the waterfall binding.


There were some lovely all over patterned papers on the back of some of the tag sheets and I had to decide very carefully where I was going to die cut my rosette! I have used a Tim Holtz die to create this rosette and run a gold pen around the edges and creases to make it look a little more sparkly!


I didn't add too much to the front of the book other than the rosette and a wide piece of lace. It took a while to find a perfectly sized sentiment, but it was found in the end!


I wanted to close the book without using ribbons, so used another die (Eileen Hull's Journal die) for this closure. Although it is for a much larger book it fitted this chunky min album perfectly. I normally cut the papers so the board can fold.


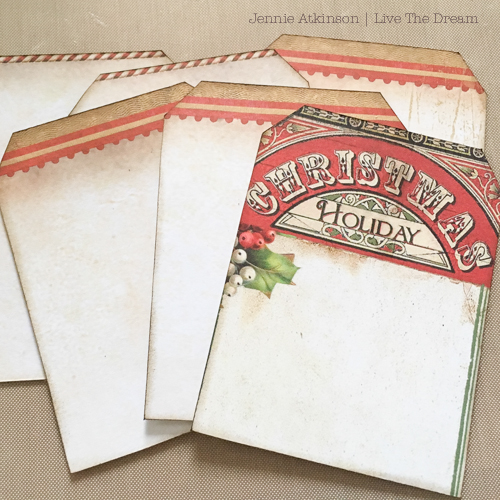
I created some tags to fit the pockets and managed to find some unpatterned parts of the paper so I can write on both sides of the tags.


Finally I stuck the waterfall book onto the back cover ......


..... and used a couple of small magnets on the closure. I will come clean and say that I had included ribbon under the front cover papers but it just didn't look right so the magnets were an afterthought! Normally I would have stuck them under the papers!


I think this little album will look very sweet sitting amongst the fir cones under the Christmas tree and will be a small memory of our celebrations this year. My thanks to Teresa Morgan for a super mini album design! And now all that's left to do is to wish you all the best wishes of the Festive Season. From all of us here at Mini Album Makers our very best wishes to you all for a very happy and peaceful Christmas.

Jennie x

You are invited to the Inlinkz link party!

Click here to enter

Wednesday, November 21, 2018

Upcycled Junk Journal Tutorial by Sylvia Hildman

Welcome to the Mini Album Makers Challenge blog. My name is Sylvia Hildman of Little Treasures. I live in rural Iowa USA, a wife, mother of 2 wonderful sons and 6 beautiful grandchildren. It was much to my surprise that I was chosen to be the Guest Designer at the Mini Album Makers Challenge blog last month.   I had only made 1 journal up to this challenge, and that was a fabric book made for my sister's 40th Anniversary. My "Metal Hinge" Junk Journal was partly due to my fun husband. He asked me if I had any use for some hinges. I thought, told him "yes maybe"...so he left them lay on the table, then it hit me. I had made some Mini cardboard cut outs and 2 of these would be a great cover. The results were my " Metal Hinge" journal featured for the September challenge.
I am a re-purpose person. Left the corporate world of accounting to retire. A farm girl at heart and considered a fabric and paper junkie. With a love for chippy, shabby, vintage and old rusty junk. I love garage sales, estate sales and resale shops.  I have found mixed media more my ideal than making cards as I started when I created my blog back in 2009.  Hard to top my "Metal Hinge" journal for uniqueness but I am still learning.
 
The Style of this journal is a Ring Bound Junk Journal. The Theme- Autumn/Thanksgiving.  My cover made from on old tea dyed crocheted doily.


It is topped with leaves made from recycled corrugated packaging.  I've posted a separate tutorial on that process HERE.


To decorate the cover, I used a pumpkin made from a pull tab lid from a cat food can.  I've shared more on that process HERE.

And here is the final result...

I would like to Thank everyone at Mini Album Makers for choosing me for this honor. I am Grateful for the opportunity.To see full details and photos for the project visit my blog HERE.  I hope you're inspired to join in the November/December challenge for a chance to win a Gypsy Soul Laser Cuts prize pack.

Wednesday, November 7, 2018

Winners Post for October 2018

We had some stunning entries in our October challenge!  Thanks so much to each of you!  Make sure to peek back at those entries HERE to see all of the beautiful albums.  It's never an easy job to narrow down to a few winners, but without further ado...


The overall design team favorite badge goes to Elena Martynova.  Elena's gorgeous fabric covered shabby chic album stole our hearts.


We love the color scheme and use of materials throughout the album.  Elena, we would love for you to be our guest designer for the month of January.  Please email Autumn at teamclark@rocketmail.com to discuss further.


Our top five entries are equally incredible.  Each of you, please take our top five badge and display it proudly on your blogs.  In no particular order...


First we have Nuneka of Meraki by Nuneka with an extraordinary exploding box tutorial. 


You don't want to miss this video!  What amazing ingenuity!  So many beautiful elements combined into one wonderful project.


Next we have Людмила Каминская with a wonderful, woodsy album filled with magical detail.  


We love the unusual use of materials and gorgeous combinations of textures and dark colors.  Bravo!


Elena Marchenko shared an exquisite vintage style album with heirloom photos.  We are always delighted with you share albums with personal photos. 


We were thrilled with Elena's embellishment tutorials, so do check out her post for loads of inspiration.


Amanda from Ink-A-Pink shared a grungy journal, which contrasts the many shabby entries, but shines in all its grungy glory!  


Amanda has such an amazing artistic style and we loved seeing how this journal came to being.


Last and most certainly not least, Svetlana Topol AKA Angelwing shared a nature inspired journal, with the most gorgeous cover.


We love the combination of dried flowers and mixed media on the inserts. 


Huge thanks to each of you who played along.  And now, the winning entry of the Seth Apter Baked Texture embossing powders...


And the winner is.....


That's Kate from Kate Korn!  Kate really wowed us with her masculine album, do check out the details.  Congratulations Kate!  Please email Autumn at teamclark@rocketmail.com to claim your prize. 


We hope you are fully inspired and will play along with our November/December challenge for a chance to win a prize pack from Gypsy Soul Laser Cuts.  Join us next week for another exciting tutorial.