Tuesday, August 21, 2018

Eileen Hull Journal Inserts Tutorial by Lisa Hoel

Hello, I'm Lisa Hoel from Creative Juice and I am honored to be here as a guest designer. A little bit about me: I’m a lifelong craft lover and I’ve been ‘arting’ ever since I first picked up a crayon! Paper crafts have been my main focus for the past fifteen years or so and I love to make detailed, layered, textured, mixed-media type projects. I am not usually a clean and simple type artist. ;-) My background is in graphic design and I'm blessed to be married to the greatest guy in the world and have two dynamic boys.

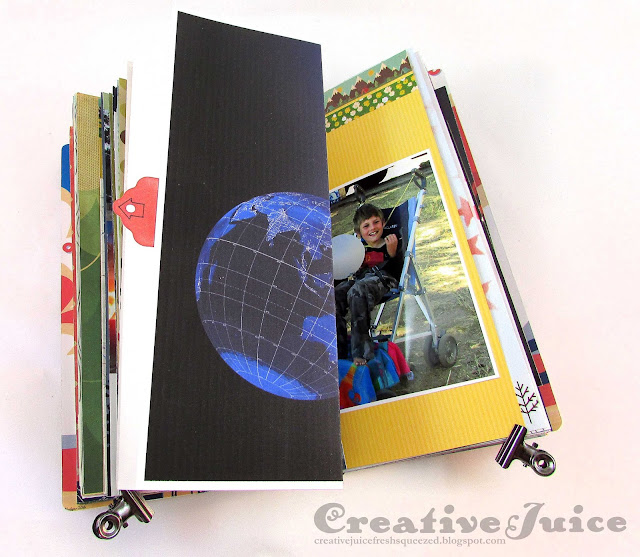
I live in Idaho and last summer I was able to travel a few hours north and be in the path of totality for the Great American Eclipse! It was exactly one year ago today that it happened and it was an amazing experience! I knew I wanted to make a keepsake journal to commemorate the event and I did get the cover all done beforehand. (See it here.) I thought it would be perfect to get all the inside parts done in time for the 1 year anniversary and to share with you. I made lots of pockets, tuck in spots and other fun elements so read on for the tutorial.


Here's a quick flip through of the insides:


The journal is made using Eileen Hull's Sizzix Journal Die. The cover dimensions are 4.5 x 8.75 inches so my special pages are sized accordingly.


1. Double pocket - This is a super easy pocket to add to your journals, especially when using double sided 12x12 scrapbook paper. The flap of paper that is in excess of your page height folds up and becomes your pockets.


Run a thin line of glue or dry adhesive along the flap edges to
seal up your pockets.


2. Single diagonal pocket – I thought it would be fun to turn this eclipse map into a pocket. Isn't my state conveniently shaped for that?  I sized the map in my design software so the state outline would fit just right and then printed it out. You could easily use regular patterned or plain paper instead.


Fold the side and bottom tabs back and adhere to the page. I made sure this page was on the outside of a signature so the outer fold wouldn't get cut off when I trimmed my signatures.


3. Pull out tuck spots – These are fun to make for larger pieces of ephemera, etc. I had some postcards that I wanted to tuck away in them.


I cut a front and a back the dimensions of my signature pages plus an inch extra in height to use as a tab. See below where I glued the tabs to the pieces to form a 'tube'.


I scored and folded it down the middle and then used a circle punch to cut the 'grabber' notches. (My technical term for them.)


4. Double diagonal pockets – I didn't have big enough double sided paper to just have a fold up piece form the pocket (like #1) so I cut a separate part to form the pockets.


Like the #2 pocket, fold the tabs under and adhere to the page.


5. Foldouts – Not a pocket but it's a fun interactive feature to include in a journal. NASA had a ton of eclipse (and hires!) resources people could download so most of my diagrams and maps came from there. The biggest prints I accordion folded and others simply fold out once.


Accordion fold
Thank you for stopping by. I hope this has sparked some ideas of things you can add to your next album project. Be sure to join in the current challenge for August.  Eileen Hull is the sponsor and you could have a chance to win one of her die sets!

Tuesday, August 14, 2018

Gypsy Soul Notebook Tutorial by Maria Lillepruun


Dear friends!  Today it is my turn (and pleasure) to present my first full video tutorial! I am very excited! I decided not to experiment this time but to make what a kind of book I am known for - a mixed media vintage notebook in my favorite size 20x12 cm. I named this romantic book "Gypsy Soul". It is partly because I used one of my favorite collections by 7 Dots Studio "Fortune-teller" (it is all about magic and gypsies) to make it. But also because I had recently received my prize from our sponsor Gypsy Soul Laser Cuts, and its name was also an inspiration for me. By the way, I used this beautiful Wrought Iron Miniatures laser cut on my notebook cover.
Here is how I created it:


Some close-ups:


This tutorial is added among others to my YouTube channel. You are welcome to visit and subscribe if you like what you see there :) Please be my guests and visit my blog, my creative Facebook account, and my Instagram account as well.

Enjoy the rest of the summer!
Love,
Maria Lillepruun

Tuesday, August 7, 2018

Winners Post for July 2018

July yielded such an amazing array of handmade books in our challenge!  There was such a great variety of themes, styles and colors.  Thanks so much to each of you!  Make sure to visit the July challenge post HERE to see all of those entries.  It's never an easy job to narrow down to a few winners, but without further ado...


The overall design team favorite badge goes to Tristan Robin Blakeman of Enchanted Revelries!  We loved Tristan's tutorial on using tag folders to create this amazing, interactive album.


The tags alone are a work of art, but this combination of paper and ephemera is truly enchanting from cover to cover!  Congratulations Tristan!  We would love to invite you to be our guest designer for the month of September.  Please email Autumn at teamclark@rocketmail.com to discuss further.


Our top five entries are equally incredible.  Each of you, please take our top five badge and display it proudly on your blogs.  In no particular order...


Elena Martynova shared this vintage delight, filled with beautiful fabric, lace and gorgeous personalized details.  What a beautiful memento for this notebook's new owner!   


We loved Elena's amazing layering and use of materials throughout this stunning album.


Marty of Merry Marty Cards shared a gorgeous Christmas folio with festive embellishments and details.  Her album certainly puts one in the Christmas spirit!

We loved Marty's waterfall design and beautiful page details, all in a perfectly nostalgic design.  


Marina Kurbatova of Scrap Line made our hearts flutter at this darling tiny mini album within a box!  


Every page of this tiny wonder is bursting with details that delight and inspire!


Mukta Parvatikar-Maniar of VREnchanted shared this stunning steampunk style masculine album.  


Each page is filled with gorgeous flaps and pockets, all in harmony with this great theme and monochromatic color scheme.  


Finally, Heather Maxwell of Vestige Blog completely transformed a die cut journal into a rustic work of art!


Heather's eye for design leaves no detail lacking.  She used this exquisite paper line and her mediums to perfection.  We adore it Heather!


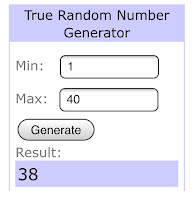
A big thanks to each of you who played along.  And now, the announcement of the winner of the $25 gift certificate to LindyS Stamp Gang...


And the winner is.....


That's Heather of Vestige Blog!  Biggest congratulations Heather!  Please email Autumn at teamclark@rocketmail.com to claim your prize.  We hope you are fully inspired and will play along with our August challenge for a chance to win an Eileen Hull Journaling Hearts Die.  Join us on the 14th for a fantastic design team tutorial by DT member Maria.

Wednesday, August 1, 2018

August Mini Album Tutorials and Challenge

Happy August makers!  July has come and gone and our July Challenge has commenced with 40+ wonderful entries.  Every single book was amazing and inspiring!  Make sure to check out those beautiful projects HERE.   As we begin a new challenge we wanted to remind you that any book in any style is welcome here at Mini Album Makers, so come on and join the fun.  This month we are pleased to have Eileen Hull as our sponsor.  Eileen has generously offered a Journaling Cards - Hearts Die as this month's prize!


Eileen is a Sizzix signature designer.  Her passion for papercrafting has flooded the industry with incredible, innovative products that make papercrafting an ease and joy!  Find out more about Eileen and join her Facebook Fan Club today!


Our team works hard to provide you with an amazing variety of mini album tutorials for your inspiration.  Hop around to each designer's blog for the full reveal and tutorial.

Anne

Since Eileen Hull is our Sponsor for this month, I have used her new Wrapped Journal die, along my my favourite Tim Holtz fabric to create a journal.  You can see more HERE.


Nancy


This mini is using fabric for binding and leftover envelopes for pages with a twist on the hidden hinge binding system.  See details on my blog.


I have also used Eileen's Wrapped Journal Die this month to make an "Observations" journal  so that I can keep a track of my handspun wool and the items I knit with it. I wanted a tactile textile journal that could sit in my knitting basket and so I have used canvas and tea-dyed lace and ribbons in my vintage shabby style. For more details and a step by step on how I created this journal then please do join me over on my blog HERE.


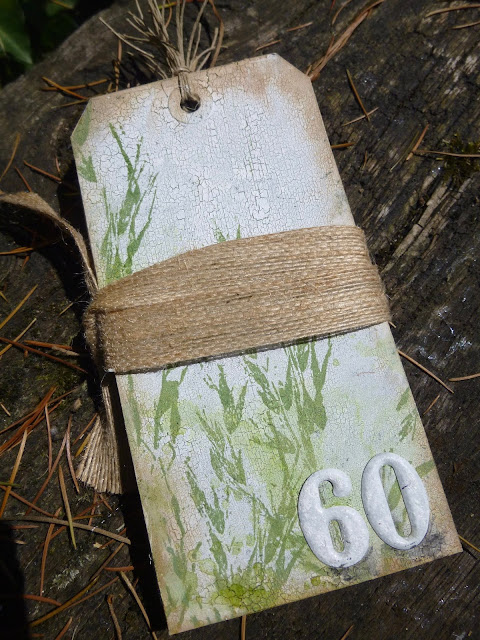
I was in two minds about whether to show you the inside or the outside of the accordion tag book I've created this month.  It was made to commemorate sixty years of a very special friendship.  This simple, rustic exterior leads to summer garden delights on the inside, so I hope it will tempt you over to Words and Pictures to take a look. 


Dear friends! My project for this month is this mystic mixed media notebook "Druid". I recorded a video tutorial for you on how I made this beautiful face on the cover. In the video, I speak of two different air-hardening clays, silicon molds and show you the whole process of casting. This is my absolute first voice tutorial in English, so I am super nervous :-) See the video and all the additional pictures on my blog HERE.


Hello! I made a very simple velvet notebook with flowers. I wrote down for you step by step a video and invite to my blog.


I also used Eileen's new Wrap Journal die to create my Entomology journal, filled to the brim with Tim Holtz and vintage ephemera.  This little journal is busting with details, so please join me at SewPaperPaint for the closeups.  

**********************************************

I hope these peeks have sparked your imagination and you will pay the design team blogs a visit plus play along with our challenge, which ends at 11:55 pm EST on August 31.  Join us on August 7 for our July winners announcement.


Our challenge follows a few simple rules:
Any Handmade Book Goes.  Enter any form of handmade mini albums, scrapbooks, journals and book arts.  Our focus is on completed works, so no layouts or journal spreads that are not part of a complete handmade book project.  You do not have to provide a tutorial, but we wish you would.  Feel free to use one of the DT tutorials to make your project and give proper credit where due.  No back linking allowed.  You must add our badge to your post and link to our challenge to be eligible to win the prize.  Combine with any other challenges as applicable.  No limit on entries.  Permalinks only and no back linking.  Share the love by visiting and commenting on other entries.  Please become a follower.  That's it - have fun!

* Make sure to add our badge to your post *
and link back to our challenge. 


*NEW*
Submit your entries to our Facebook page for extra love.
Tag us @minialbummakers with your entries on Instagram for a repost.

Please note: This is a public blog and by linking your project you agree to have your name, blog link and the creation you linked shown on this blog and other Mini Album Maker Challenge social media sites. If you do not agree to this, please do not join in the challenge. Also, remember that any comments and/or linked projects left on this blog will be visible/clickable by third parties as this blog is public.  Email addresses are required for entry by InLinkz and accessible to this blog's moderators.  Your email address may be used to contact you regarding your entries.  We will not share your information willingly for any other purposes.  (This was posted to be in compliance with the new GDPR law that will soon become effective in the EU, and will also apply to blogs located in the US if blog visitors reside in the EU.)