Saturday, October 21, 2017

One Sheet Wonder Mini Album Tutorial by Li-bee-ti


Hi to all mini album makers, it's Libeeti here with a super quick and fun mini album, you can easily make in an hour or so, using one cardstock or designer paper and some DP and embellishments.  The size of this mini album is 5 1/8" x 3 7/8", and it can hold up to 15 small photos plus some journaling tags.  You can either make it as a mini album that stands for itself, or as an insert in a larger mini album, to document separate events or trips, etc.

For a long time I've been intrigued by the concept of 'One Sheet Wonder (OSW)' to make a mini album or an insert that holds a few photos, and I searched Pinterest for ideas.  There are many tutorials, with many variations of OSW, and I decided to use this tutorial by Claudia.  The measurements are in cm, so if you need the instructions to be in inches, you can use this tutorial, which has a table of measurements in inches.

I used papers from a very beautiful Graphic 45 collection - 'Portrait of a Lady'.  For the base I used 12x12 DP (these papers are so thick, and it's perfect for mini albums!) and for the decoration I've used some 8x8 papers, fabric flowers, lace flowers, eyelets and baker's twine.


My mini album is a little different from the original one, as I wantd it to hold more photos, so I did some flaps and pockets, and also made a booklet.  I could do it easily since the construction had gussets of 1/4".


You can see that I've added a small pocket on the outer part of the middle section:


And a little decoration I adhered partially, so it can hold a journaling tag and a small tag for date etc.


And the booklet:


A tip: when making a mini album based on folds and flaps, without a hinge, keep your embellishments in the inner part of the mini flat, otherwise you won't be able to close it properly.

You can close the mini album either with a ribbon (make sure to adhere it to the base before you decorate the front and back cover.  Another option is to use magnets to close the album (again, make sure to put the magnets before decoration the base.

You can see more closeups of my mini album on my blog HERE.  There are many other mini albums on my blog, so feel free to scroll through the 'mini albums' tab.  Thank you so much for inviting me to be your GD this month,
Libeeti
You are invited to the Inlinkz link party!
Click here to enter

Saturday, October 14, 2017

Mini Album Tutorial by Anne Redfern - Charm Mini Album

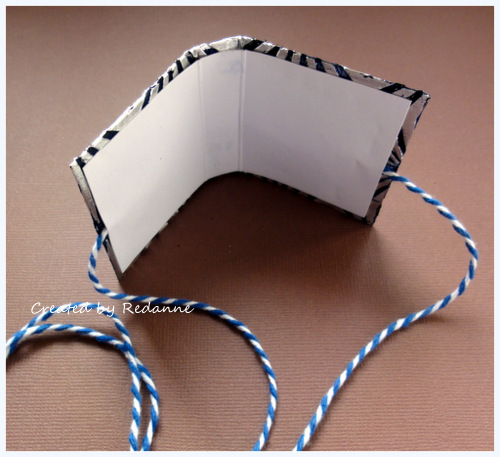
Hello, Anne here to share a little tutorial.  Each year a dear friend and I meet up to share a project we have learned.  This year Margie shared with me how to make a mini album handbag/purse charm and I have been slightly addicted ever since.  They would make great gifts for Christmas...


They can be made from small amounts of scrap paper, card, fabric, leather etc., and the finished size works out at 2" square and 1/2" deep (but you can make them in any size you like).


Gather your supplies, I also added paint and a sanding block later on.  I am using plain card just so that the measurements show up easier.  I will be showing a foil covered version here.


1)  Cut one piece of card 4.1/2" x 2" and score at 2" and 2.1/2"2)  Cut one piece of card 4.1/4" x 1.7/8" and score at 1.7/8" and 2.3/8"


3)  Cut two strips of card 10.1/2" x 1.3/4"
4)  Score at 1.3/4", 3/1/2", 5.1/4", 7"and 8.1/4"
5)  Accordion fold both pieces (double sided cardstock works really well for this section).  You can make the strips longer if you wish at this point, just keep the score spacing the same.


6)  Cover the larger piece with foil (I used foil from the DIY store) and fold over neatly.


7)  Emboss with an embossing folder of your choice.


8)  Paint the cover with a good quality acrylic paint, on both sides of the foil element.


9)  Once the paint is dry, use a sanding block gently to remove paint from the raised areas inside and out.  If you use a DIY foil like I did, be very gentle.


10)  At this point, think about the type of closure you want, if it is ribbon or twine, add this now with some strong double sided tape.  You may wish to experiment with other types of closure, whatever suits the type of mini album you wish to create.


11)  You are now ready to 'line' the inside of the album.  Join at the spine first but not the side pieces.
12)  Gently fold the album at the score points.  You may need to trim off some of the side pieces as you do not want them to overlap the edge of the album.  Once you are happy with the placement, glue into place.

13)  Join the two long scored strips together.  You need to end up with an even number of the squares, in this case I had to cut one off.


14)  Join the accordion strip as shown above.


15)  Your album should now fold in as shown - the little pages are not joined at the spine.


16)  Use a hole punch to create a hole at the top of the album and add an eyelet - this is where your hanging chain or other embellishment will fix to the album.
17)  Your album is now ready to decorate/embellish in any way you wish. 


A mini Halloween charm album.


This Christmas charm album includes some of our very own Alison Bomber's fabulous new stamps!  I hope you enjoyed my tutorial and if you feel inspired to create one, please do share them in one of our mini album challenges!  Thanks so much!  Don't forget to join in our October challenge for a chance to win a fabulous Gypsy Soul Laser Cuts prize pack!  


Hugs,  Anne  xx

Saturday, October 7, 2017

Winners Post for September 2017

Boy did we ever have a difficult task in narrowing down our design team favorite and top 5 from the amazing array of entries in our September challenge!  Every single album was a visual delight and huge inspiration to us all.  If you haven't visited the September blog post since the end of the month, make sure to check out the full list of projects HERE.  


The overall design team favorite badge goes to Heather from Vestige Blog!  Heather, we would love to be our guest designer for the month of November.  Please email me at teamclark@rocketmail.com to discuss further.


Heather's cover techniques truly amazed us.  Her binding and closure were incredible, let alone the gorgeous interior.  Well done Heather!  We are so pleased that you shared with us.  Please take the badge above and display it proudly on your blog.


Our top five entries are equally stunning.  Each of you, please take our top five badge and display it proudly on your blogs.  In no particular order...


Olga Ragozina from Gifts With a Soul whose fabric cover and gorgeous album interior left us in pure wonder!  


What a precious theme and thoughtful page layouts.  A truly beautiful gift!


Julia Aston from Create With Me showed off her skills with this delightful tiny mini album - what fun!  


These teeny tiny accordion albums presented so beautifully in their handmade boxes.  Adorable!


Bella Basson from Bella's Creative Space shared her amazing techniques for creating an album cover and closure.  


Thanks Bella for sharing this video flip through of your album pages, how cool!  What a great way to showcase those photos!


Alicia O'Bryant of Golden Goodness shared a truly delightful altered Altoid tin/album.


What an absolutely wonderful upcycle and beautiful use of this designer paper!


Last but certainly not least, we have the ever talented Christine from Craftyfield whose DIY Midori Journal/Fauxdori is a must make!


Christine's use of gelli printed papers for her inserts made this journal a true work of art!


Thank you all so very much for playing along.  And now for the winner's announcement for the fabulous prize pack, donated by the ever talented and generous Seth Apter.


And the winner is.....


Maggie of Capricorn Crafts!!!  Oh Maggie, we are delighted for you!  Maggie's gorgeous journal is a must see!  Please head on over and show her some love/congratulations.  Maggie, please email me at teamclark@rocketmail.com to claim your prize.


We hope you are fully inspired and will play along with our October challenge for a chance to win a fabulous assortment of chipboards from our sponsor, Gypsy Soul Laser Cuts.  Have a lovely, crafty day!

Sunday, October 1, 2017

October Mini Album Tutorials and Challenge

Happy October book makers!  Thank you so much for joining us in our kickoff challenge.  We had over 40 fabulous entries!!!  It was amazing to see each and every project and get to know new faces.  Today we begin a new challenge and have a lovely new sponsor, Gypsy Soul Laser Cuts.  One lucky winner from this month's entries will receive a wonderful assortment of chipboard from the shop.  Our very own Nancy Wethington is on the design team for GSLC, so do hop on over to the blog for more inspiration.  


Find more information about Gypsy Soul Laser Cuts here:


Our team has been working diligently to produce these inspiring projects and will be sharing tutorials on their personal blogs, so do hop around for all the details.  


Anne


Gloria


I hope this has whet your appetite with inspiration and you will play along with our challenge, which ends at midnight on October 31.  Join us on October 7 for our September winners announcement.  


Our challenge follows a few simple rules:
Any Handmade Book Goes.  Enter any form of handmade mini albums, scrapbooks, journals and book arts.  Our focus is on completed works, so no layouts or journal spreads that are not part of a complete handmade book project.  You do not have to provide a tutorial, but we wish you would.  Feel free to use one of the DT tutorials to make your project and give proper credit where due.  No back linking allowed.  Please add our badge to your post and link to our challenge.  Combine with any other challenges as applicable.  No limit on entries.  Share the love by visiting and commenting on other entries.  Please become a follower.  That's it - have fun!


You are invited to the Inlinkz link party!
Click here to enter